The weather hasn't really played along with astrophotography as a hobby. It rained almost non-stop for almost two months and the nearly rainless days and nights were completely overcast. The clouds thinned out enough to shoot thru for a hour or so, even then it was a 3/8 cloudy sky.
I wasn't certain what I'll get for this target, the chart showed emission and dark nebulae as targets, so I decided to take a look. It's a bit larger than my FOV, so framing was a compromise to get the interesting filaments in view. Does it look like a bat to you too?
Via Flickr:
The IC 5068 sits below the North-America and Pelican nebulae, it's a fairly large emission target with many dark dust filaments (AFAIK) about half way between the nebula and us.
Narrowband H-alpha, 3x 20min exposures.
2012-10-27
2012-08-26
Obscured by clouds
The astronomical darkness has finally arrived. At the start of the new season I decided to try my luck with a small mosaic project of the North-America and Pelican nebulae as the objects are fairly bright and the darkness lasts only a short moment for now.
Last night was the first clear night with astronomical darkness lasting a bit under three hours. In four months the astronomical darkness should last for almost 12 hours, a significant difference there.
Via Flickr:
The famous North-America and Pelican nebulae are part of the same vast emission cloud, but the dark dusty clouds between us and the glowing gas shape the view to the familiar shapes.
LRGB 2x2 frame mosaic, 3x5min per channel and panel. Original frame at 100dpi would yield a nice 150x110 centimeter poster, but more light is needed for better SNR and color gradient corrections.
Last night was the first clear night with astronomical darkness lasting a bit under three hours. In four months the astronomical darkness should last for almost 12 hours, a significant difference there.
Via Flickr:
The famous North-America and Pelican nebulae are part of the same vast emission cloud, but the dark dusty clouds between us and the glowing gas shape the view to the familiar shapes.
LRGB 2x2 frame mosaic, 3x5min per channel and panel. Original frame at 100dpi would yield a nice 150x110 centimeter poster, but more light is needed for better SNR and color gradient corrections.
2012-08-07
Fitting the gear
The future skycam and SQM housing for Kirkkonummen Komeetta observatory site is made of a 45deg 110mm sewer junction, end caps and clear acrylic domes. The gear is press-fitted into place with thick, heavy foam rubber.
2012-08-03
Greener pastures
The lush green grass has kept me fairly well off the computer during summer time. Early in the season I had a pro take a look at my swing and assign a training program. The results have been encouraging, gaining a club length in distance and significantly reduced the random hook/slice errors per round. Getting longer shots has cause a bit of trouble estimating the right club choic, and fairly frequently I've found myself in situations I couldn't even comprehend earlier.
Today was a significant exception to the better play regime. It served as a reminder on how well compared to past games I've played this season and the last. But the culprit was easy to identify. Approaching winter and dark skies have stirred a bit of life at the observatory and I'd spent yesterday doing physical labour with a chisel and wooden mallet in hand. The pounding hand was a bit shaken today, and just getting a natural feeling grip was a challenge let along getting a clean, effortless swing in rhythm. Funny how those little things can affect your game.
Currently the big question is, do I want to upgrade any part of my astrophoto setup for the coming season? The options are fairly limited with a budget available. I could get hyperstar for my own C8, but that would mean getting a 2" filter set and upgrading the rear cell focusing system to an automated one. That's stretching the budget a "bit" beyond the funds. I could hog most of the imaging time from the club William Optics, it gives a good, flat field with a near perfect angular resolution in the Finnish seeing (about 1.75"/px on my camera). The TS-Quad isn't quite as nice for my camera and it would match a C8+Hyperstar in focal length at 420mm (vs 425mm with Hyperstar). And it's a lot slower at f/6.5 vs f/2.1 for the C8 Hyperstar, a difference of over three stops. Hard decisions, and only three weeks to first moment of astronomical darkness for the next season.
Today was a significant exception to the better play regime. It served as a reminder on how well compared to past games I've played this season and the last. But the culprit was easy to identify. Approaching winter and dark skies have stirred a bit of life at the observatory and I'd spent yesterday doing physical labour with a chisel and wooden mallet in hand. The pounding hand was a bit shaken today, and just getting a natural feeling grip was a challenge let along getting a clean, effortless swing in rhythm. Funny how those little things can affect your game.
Currently the big question is, do I want to upgrade any part of my astrophoto setup for the coming season? The options are fairly limited with a budget available. I could get hyperstar for my own C8, but that would mean getting a 2" filter set and upgrading the rear cell focusing system to an automated one. That's stretching the budget a "bit" beyond the funds. I could hog most of the imaging time from the club William Optics, it gives a good, flat field with a near perfect angular resolution in the Finnish seeing (about 1.75"/px on my camera). The TS-Quad isn't quite as nice for my camera and it would match a C8+Hyperstar in focal length at 420mm (vs 425mm with Hyperstar). And it's a lot slower at f/6.5 vs f/2.1 for the C8 Hyperstar, a difference of over three stops. Hard decisions, and only three weeks to first moment of astronomical darkness for the next season.
2012-03-07
Experiences from "Kellotapuli"
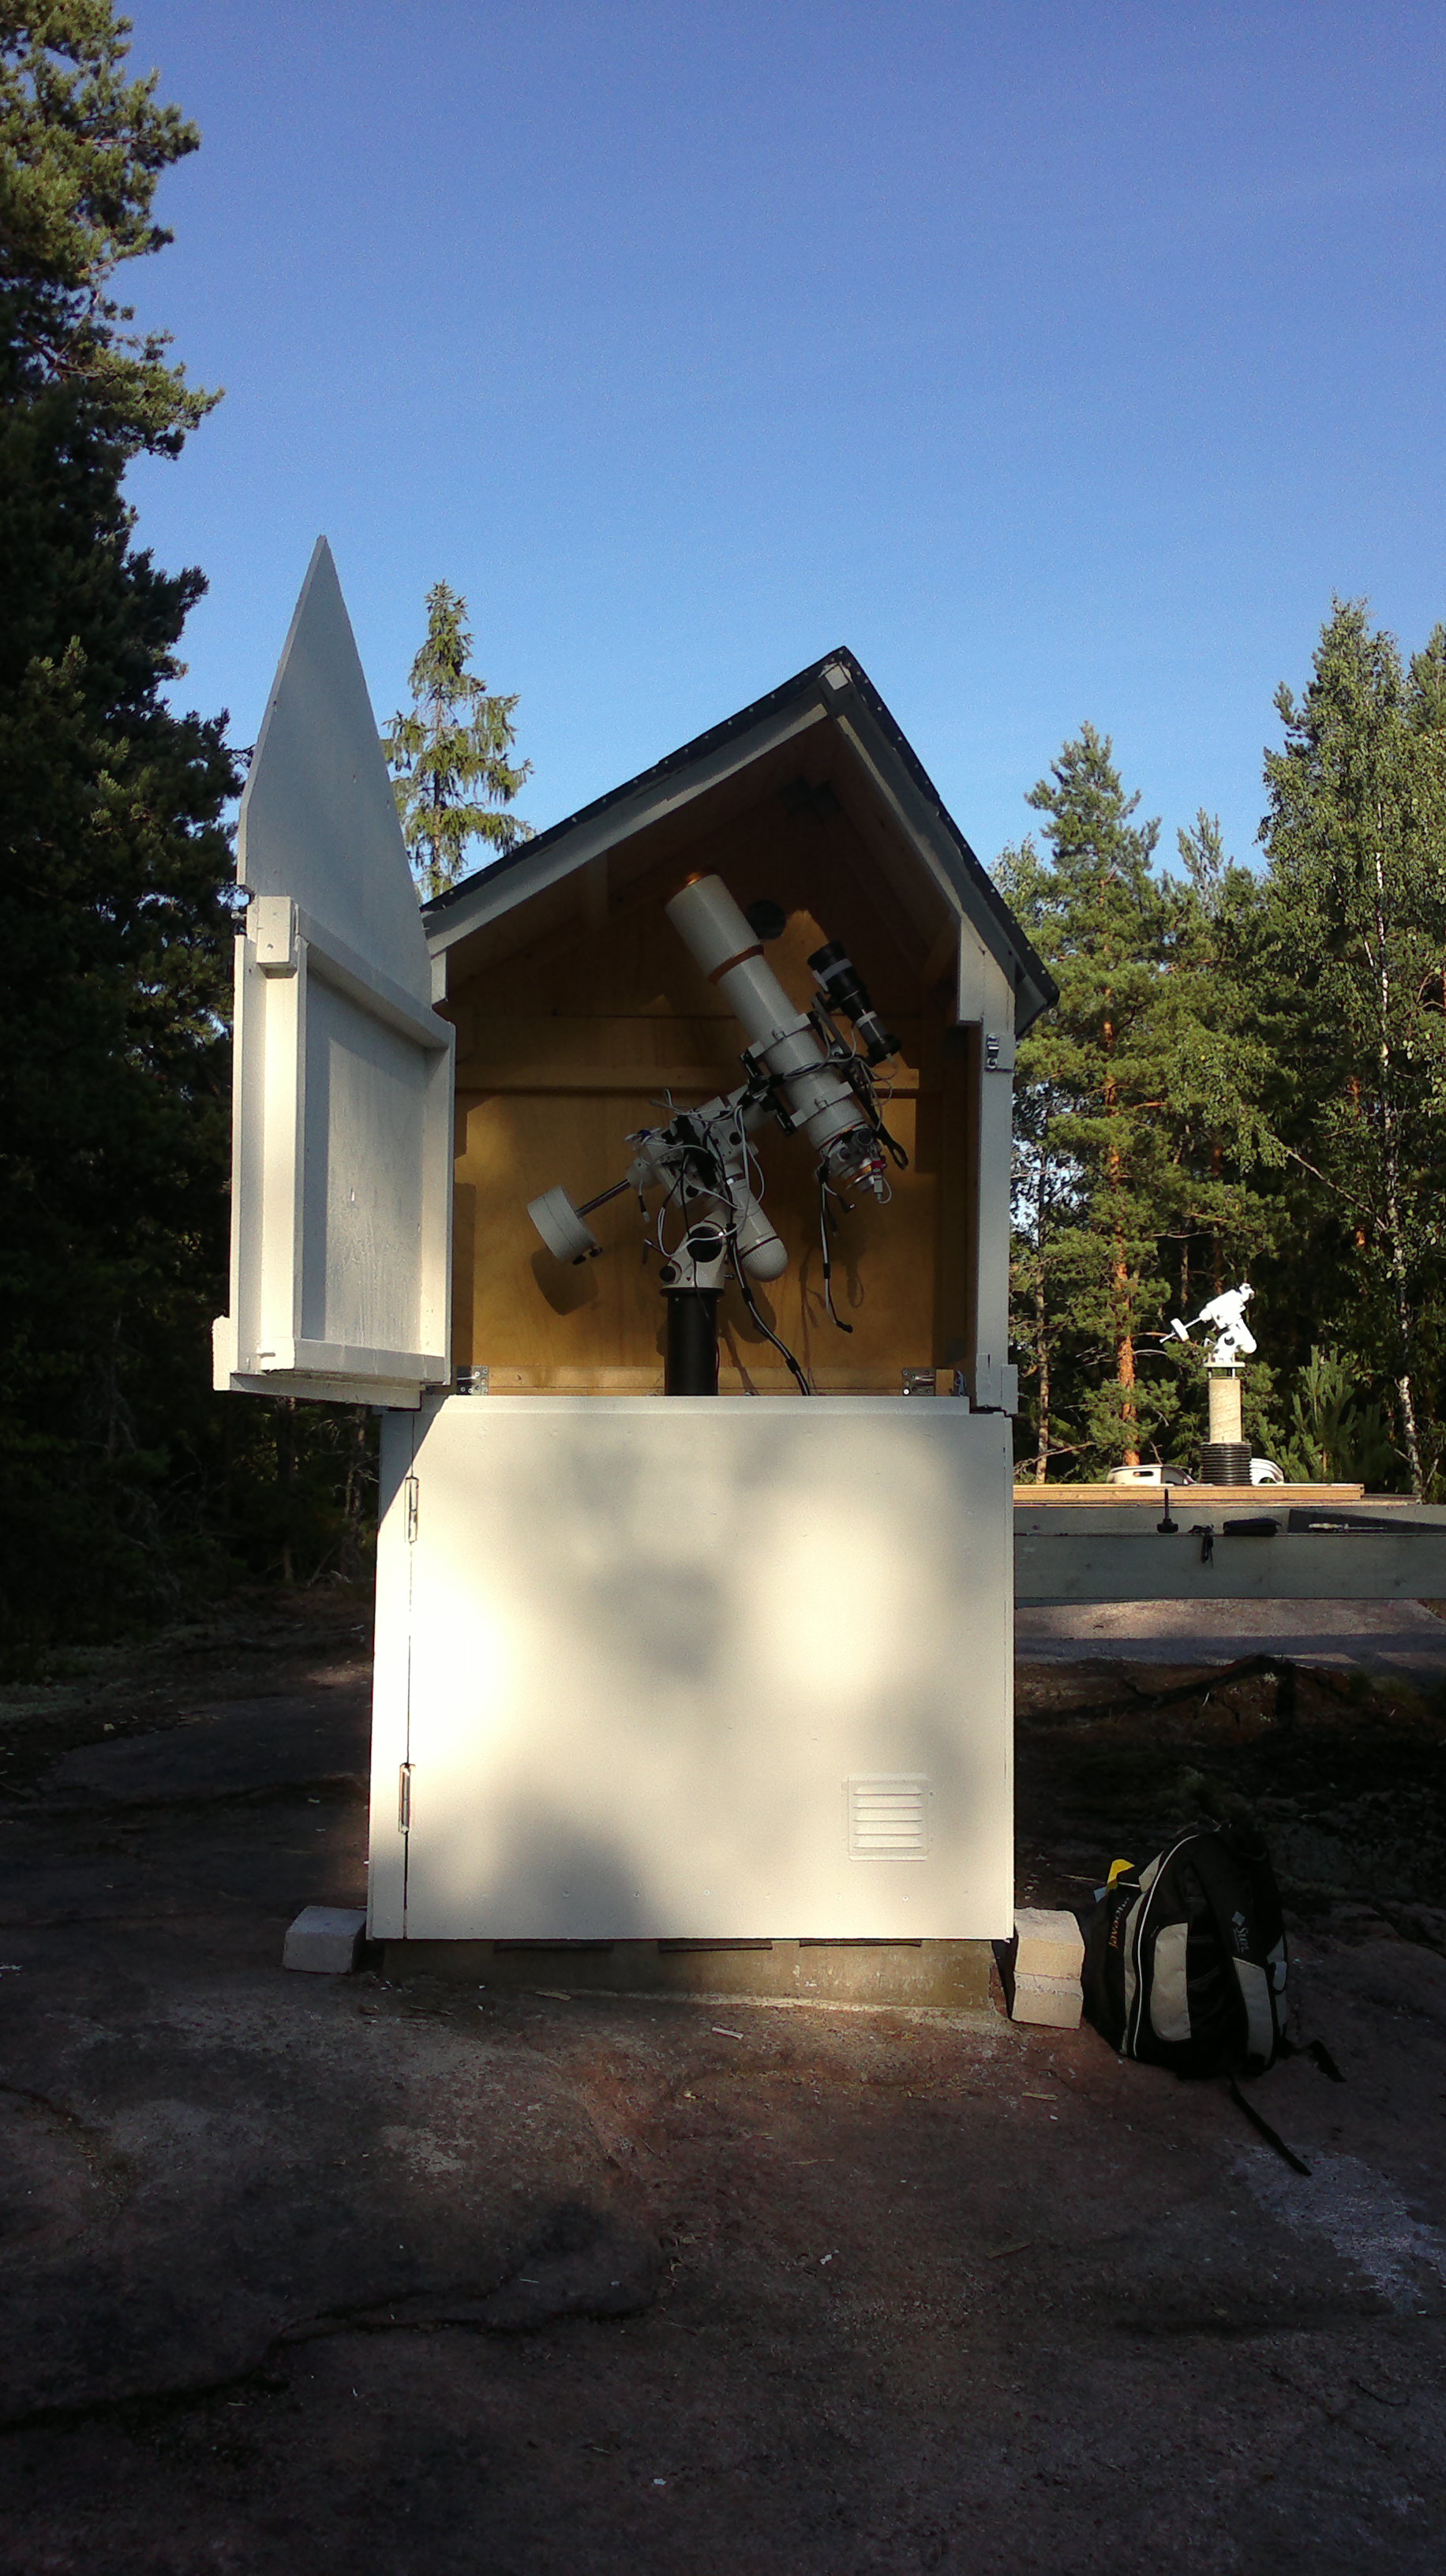
Kellotapuli (bell tower, clock tower) is the nickname for my astrophotography gear shelter, given its looks. It's a variation on the rolling roof shelter with minimal footprint (120cm x 65cm base) where the top half rolls off east. This enables using a steep 30/60 degree roof (convenient when living 60deg north) and a wall-sized door. Many claimed the tower would topple seeing it standing at close to 2.5m tall on a hill, but the looks deceive. It may be 65cm wide at base, but in that direction at the 1.2m level there's also the 3.5 meters of track bolted to bedrock at the far end.
The main design principle was to avoid shoveling snow at winter and this was achieved handsomely. A bit of shoveling is still needed to access the lower compartments where I store the EL-foil for flat fields, but next summer I'll build some additional removable shelving and other fasteners to keep the need for lower comparment access to a minimum. The rails froze over once, that caused a two minute delay opening the box. A reasonable improvement over the "out-house" shelter which necessated shoveling snow for a good hour or more.
The design was also based on the assumption that this is for astrophotography only, no creature comforts or visual observation conveniences are necessary. There's a small shelf on the north side for a laptop, power and network outlets on the wall, a small ceramic heater keeping dew out during cloudy nights and that's it. The site has a separate, heated cabin for observers, so a remote desktop connection over LAN works wonders. Almost all aspects have been motorized, polar alignment is a bit of an issue with the Synta mounts in fluctuating temperatures. Although it's mounted on a pier the alignment can be off one half a degree if the temperature changes signficantly. This I guess is mostly due to the very long lower altitude bolt contracting at a different rate than the aluminium mount base. Modding the mount base to allow for a shorter lower altitude bolt should solve this problem. The second option for the current mount is to build a completely new alt-az assembly with linear actuators for an automatic polar alignment.
Over all I'm ready to declare the Kellotapuli a success. Now I can head over to the observatory with camera and laptop in my backbag and start exposing the skies in less than 10 minutes from arrival. The slowest bit now is starting the laptop, running the imaging SW and reaching initial focus. From then on the automation could take over should I have written more scripts, but that's worth a separate blog post later on.
The main design principle was to avoid shoveling snow at winter and this was achieved handsomely. A bit of shoveling is still needed to access the lower compartments where I store the EL-foil for flat fields, but next summer I'll build some additional removable shelving and other fasteners to keep the need for lower comparment access to a minimum. The rails froze over once, that caused a two minute delay opening the box. A reasonable improvement over the "out-house" shelter which necessated shoveling snow for a good hour or more.
The design was also based on the assumption that this is for astrophotography only, no creature comforts or visual observation conveniences are necessary. There's a small shelf on the north side for a laptop, power and network outlets on the wall, a small ceramic heater keeping dew out during cloudy nights and that's it. The site has a separate, heated cabin for observers, so a remote desktop connection over LAN works wonders. Almost all aspects have been motorized, polar alignment is a bit of an issue with the Synta mounts in fluctuating temperatures. Although it's mounted on a pier the alignment can be off one half a degree if the temperature changes signficantly. This I guess is mostly due to the very long lower altitude bolt contracting at a different rate than the aluminium mount base. Modding the mount base to allow for a shorter lower altitude bolt should solve this problem. The second option for the current mount is to build a completely new alt-az assembly with linear actuators for an automatic polar alignment.
Over all I'm ready to declare the Kellotapuli a success. Now I can head over to the observatory with camera and laptop in my backbag and start exposing the skies in less than 10 minutes from arrival. The slowest bit now is starting the laptop, running the imaging SW and reaching initial focus. From then on the automation could take over should I have written more scripts, but that's worth a separate blog post later on.
2012-02-02
Pacman nebula NGC281
Day 4 in learning to use PixInsight is starting to yield results.
I tested morphological star size reduction, selective de-saturation with a star mask and very moderate luminance and chrominance noise reduction with a lightness mask to smooth out the boosted shadows while leaving the brighter, better SNR nebulous areas and stars intact.
2011-12-31
The year 2011 in a couple of pictures and a few more words
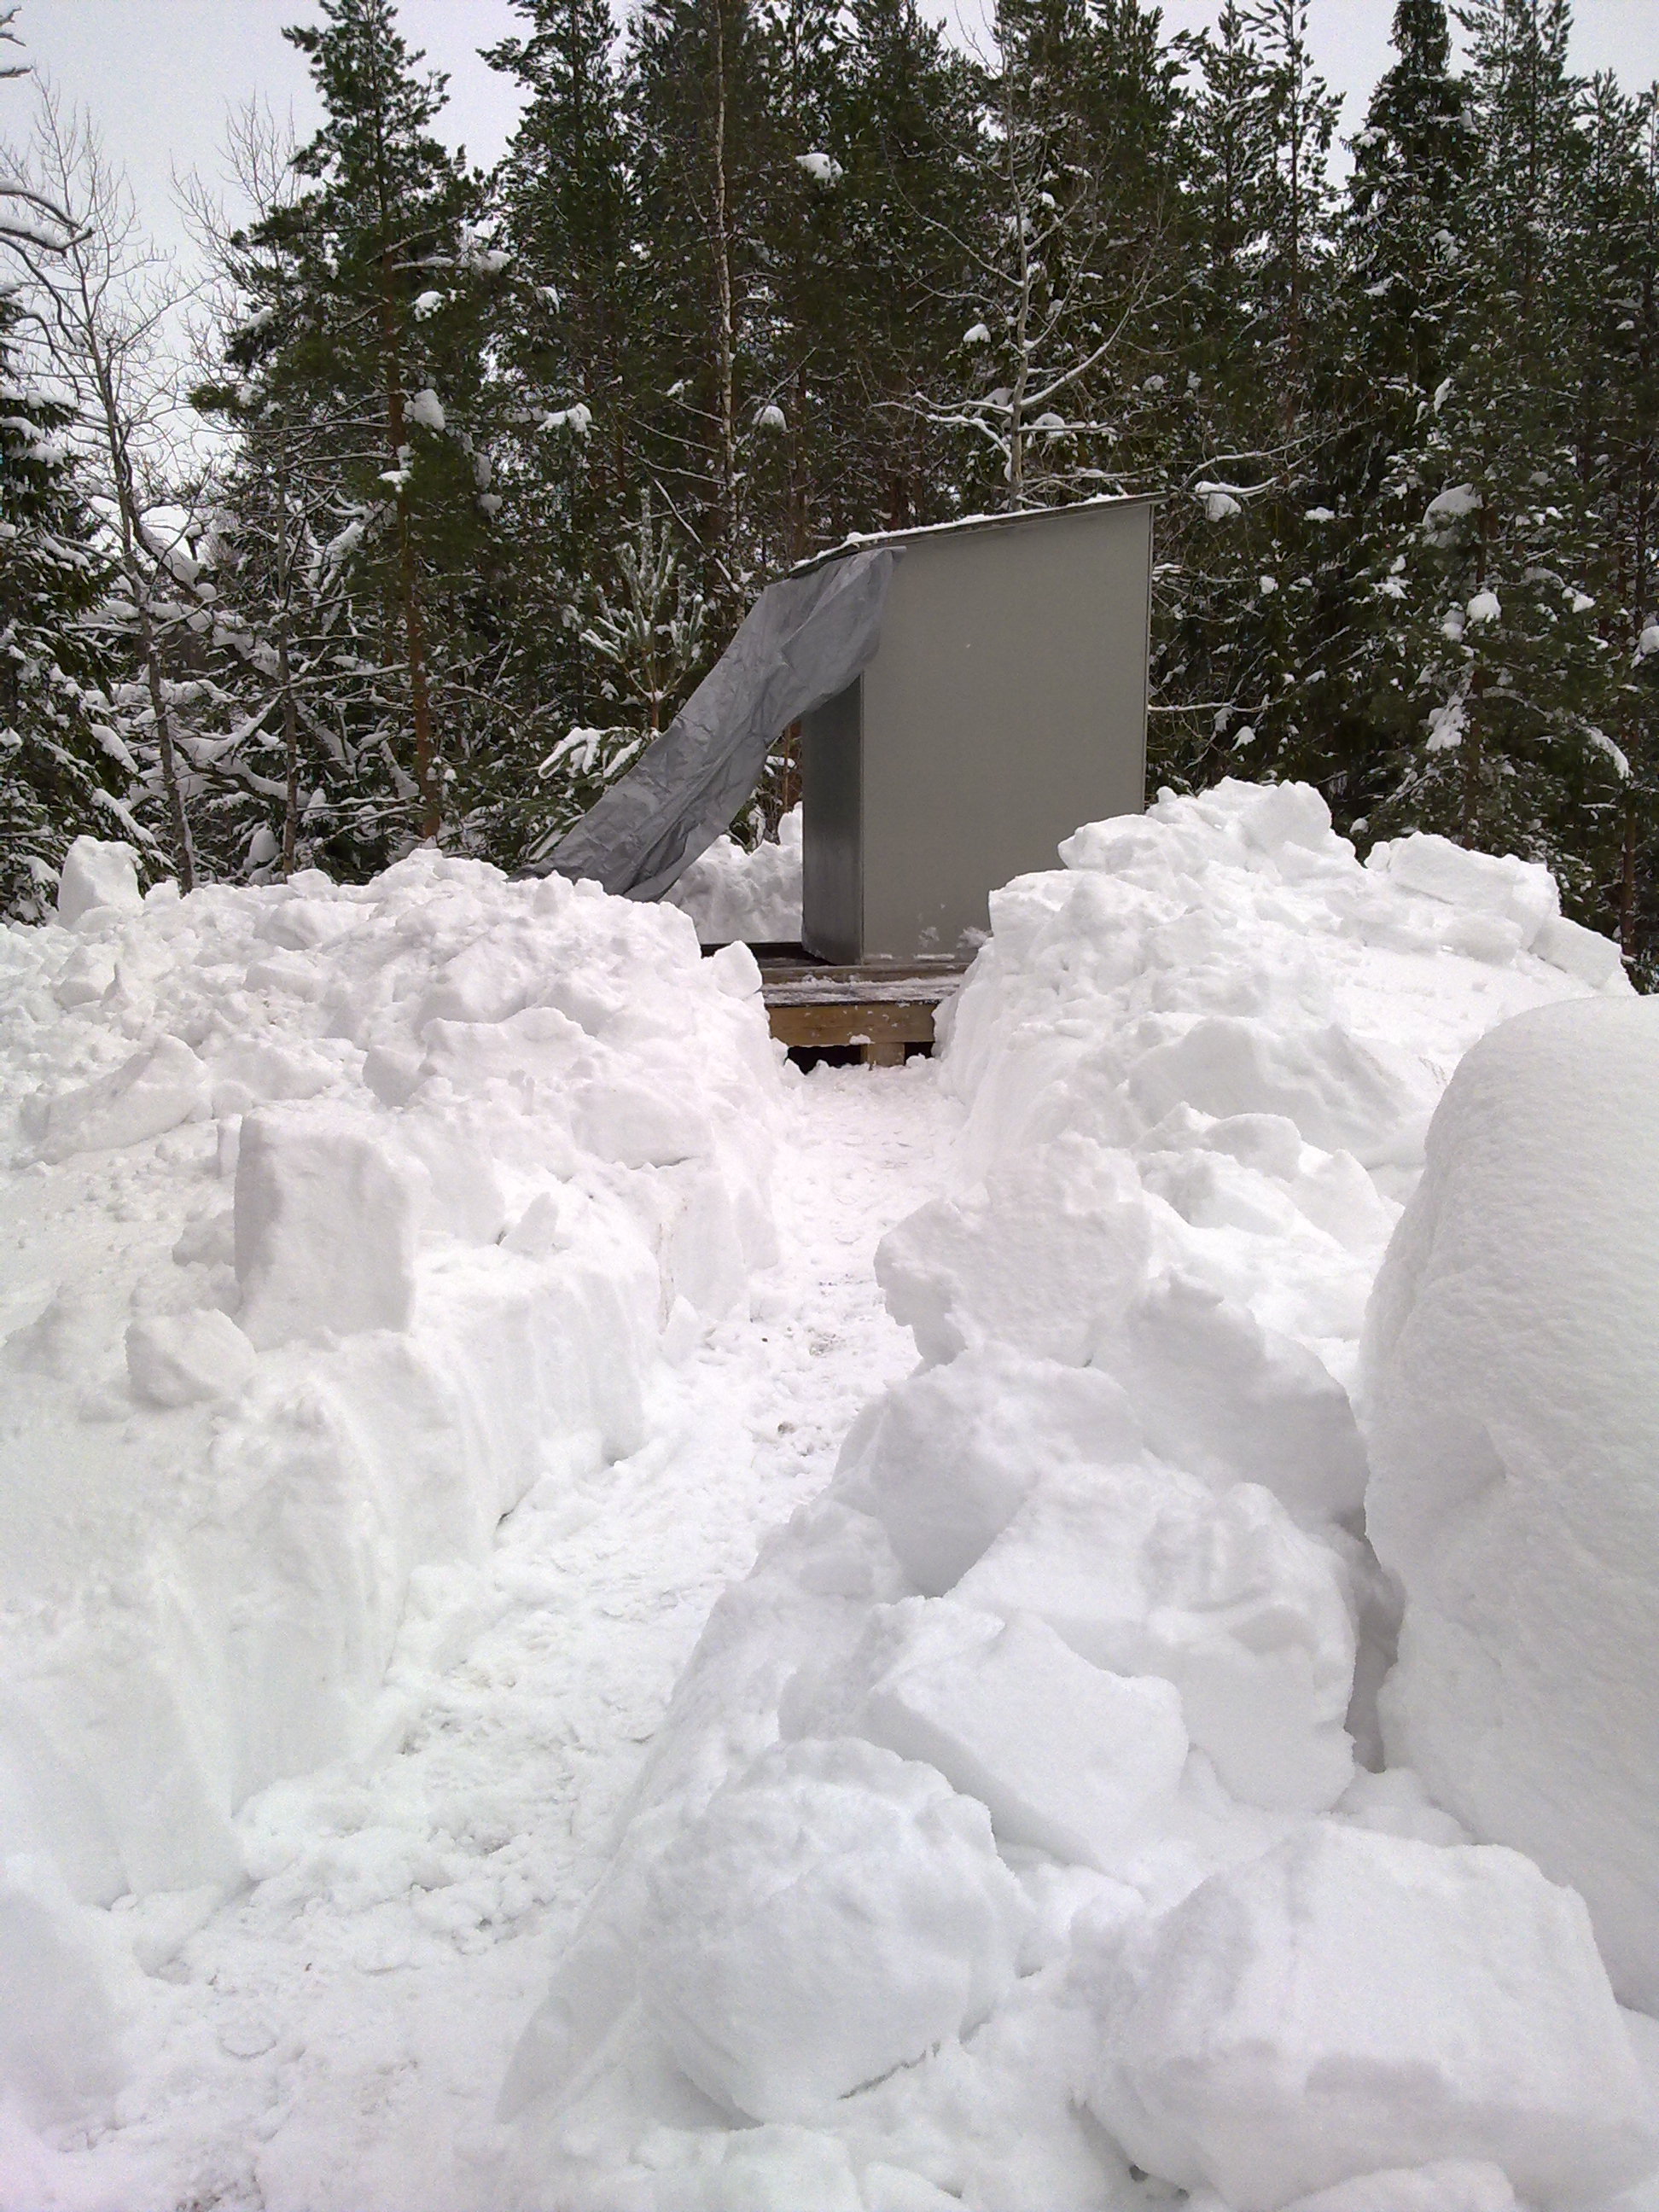
The year began in snowy, wintery weather in the south. After frequent and plentiful snow-storms it often took over an hour to dig out the observatory deck and roll the outhouse off the scope.
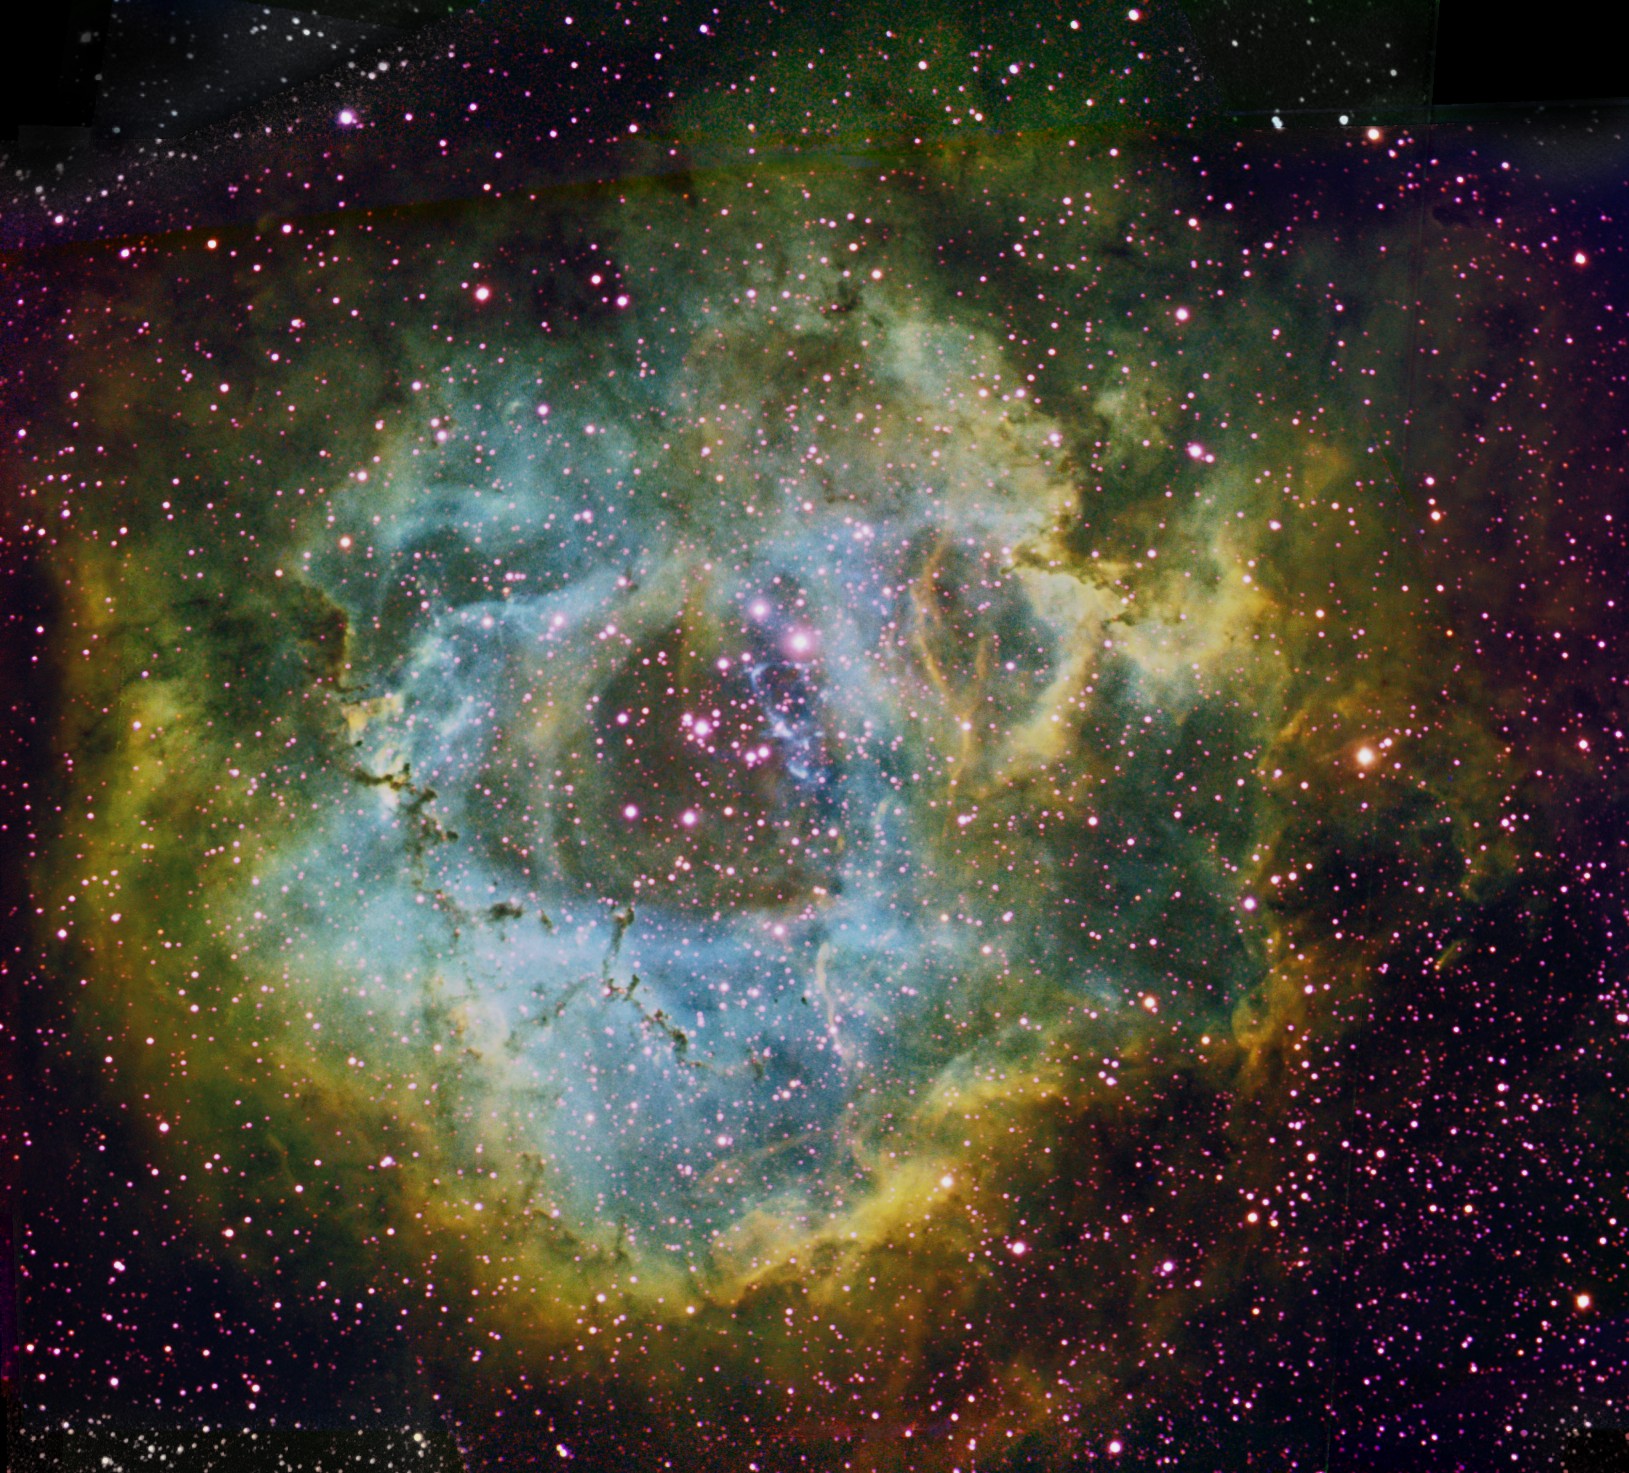
Despite the snowy conditions and random technical problems, I managed to take a successful exposure of the Rosette nebula.
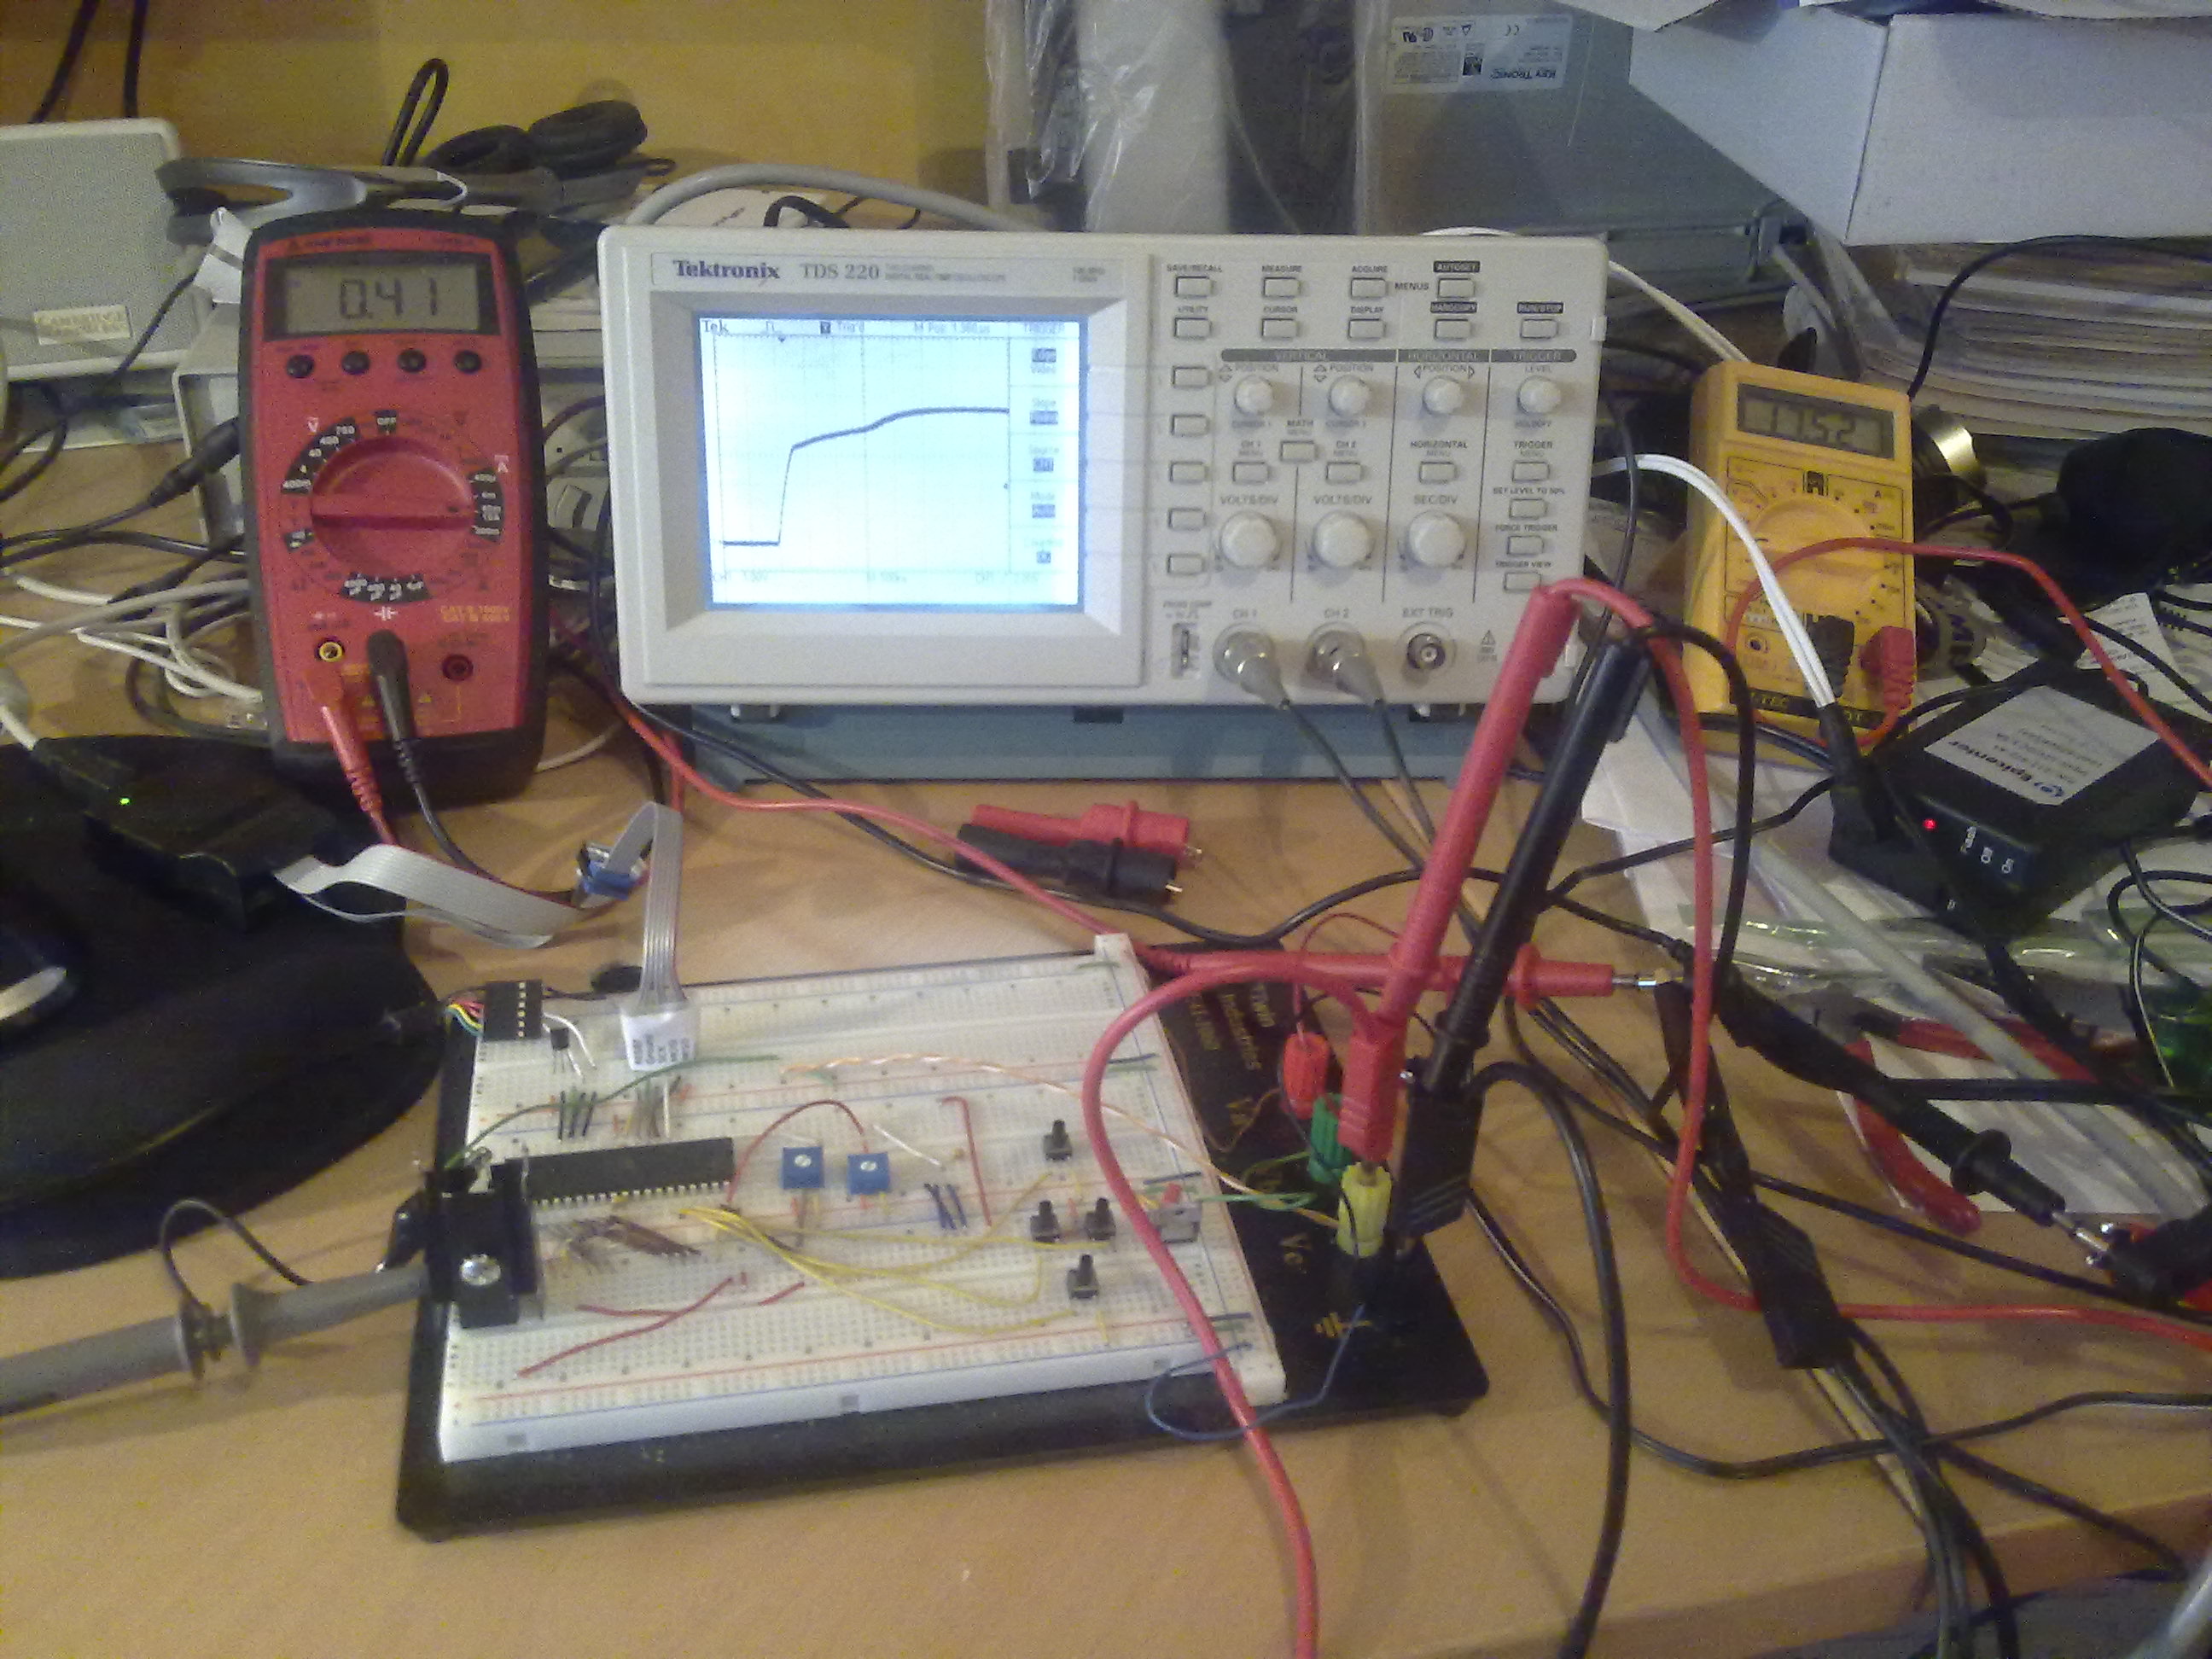
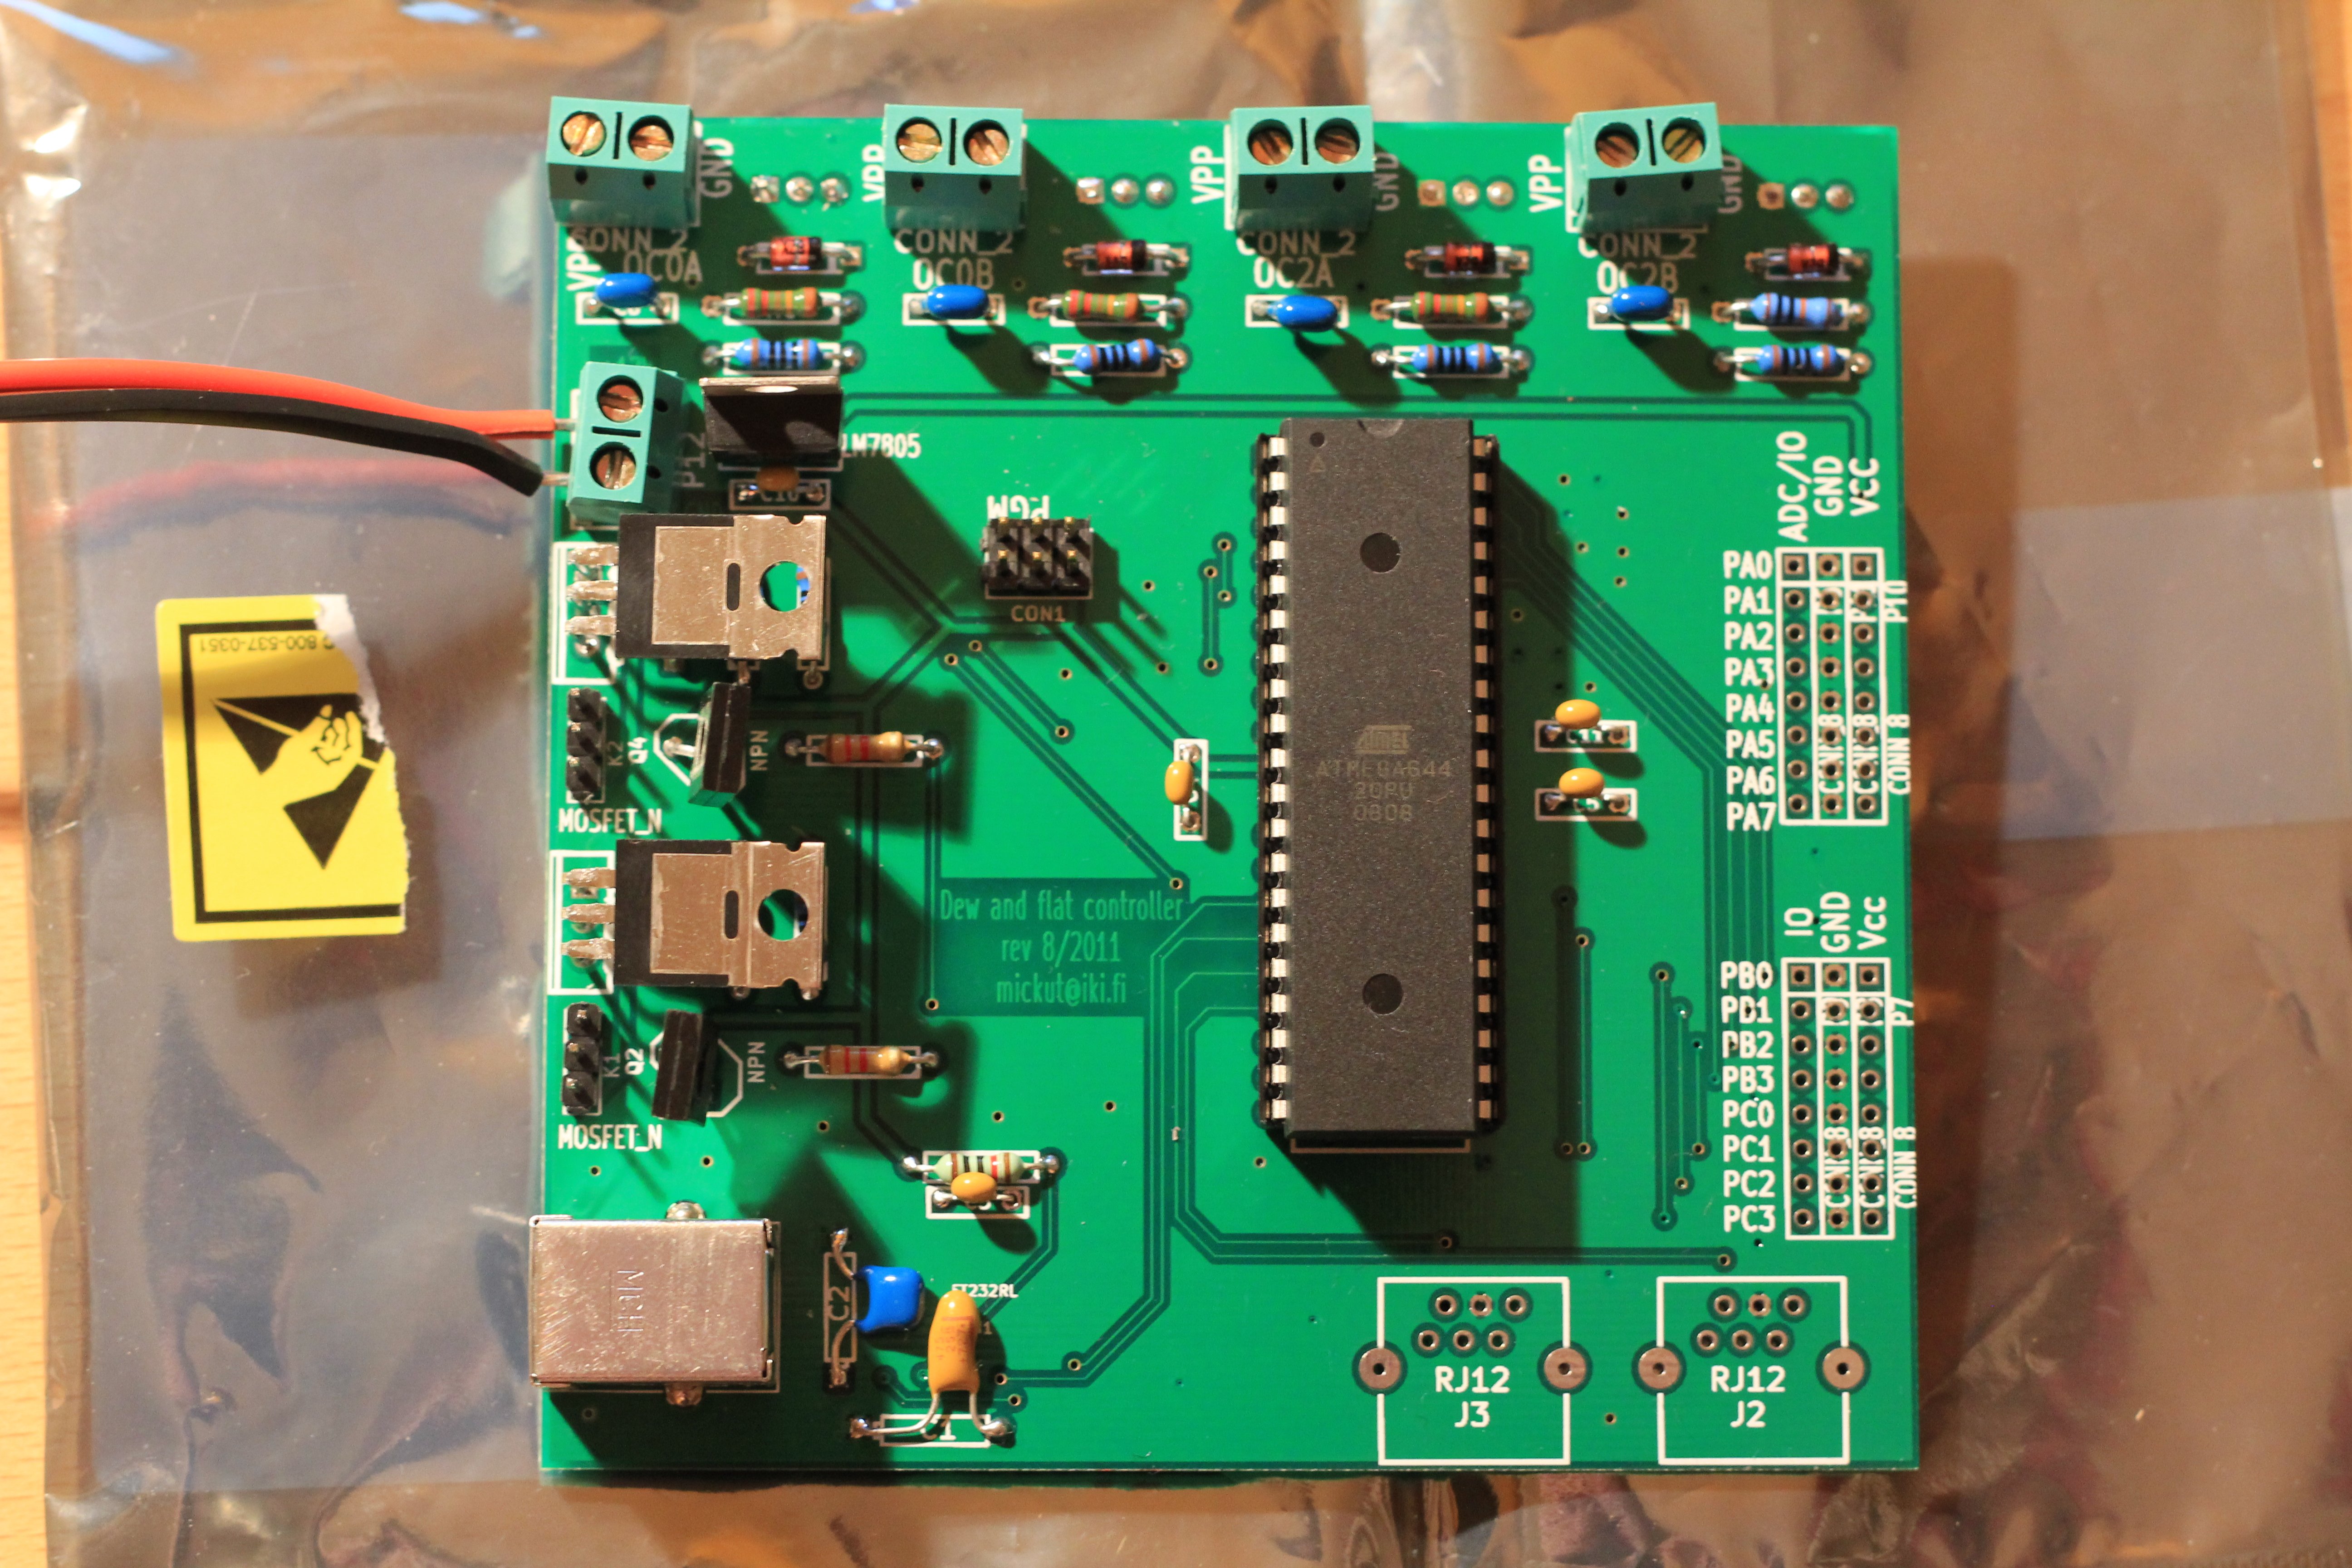
The mechanical shutter and difficult dew conditions sparked the idea for building a microcontroller based dew heater and flat-frame illuminator controller box. After a few nights of tweaking I had my first protoboard build up and running, the flat-panel light level was adjustable after all.
At the end of February my "big" project reached its conclusion and my first reasonably good HST palette image ever taken saw the light of day. Rosette nebula in narrowband false color with total integration time of 21 hours was the new par to exceed in coming weeks and months. The project was shot with 2x2 binning since I couldn't get pin-point round stars across the field for some reason with the astro-club's William Optics FLT-110 and the WO FR/FF-III reducer/flattener.
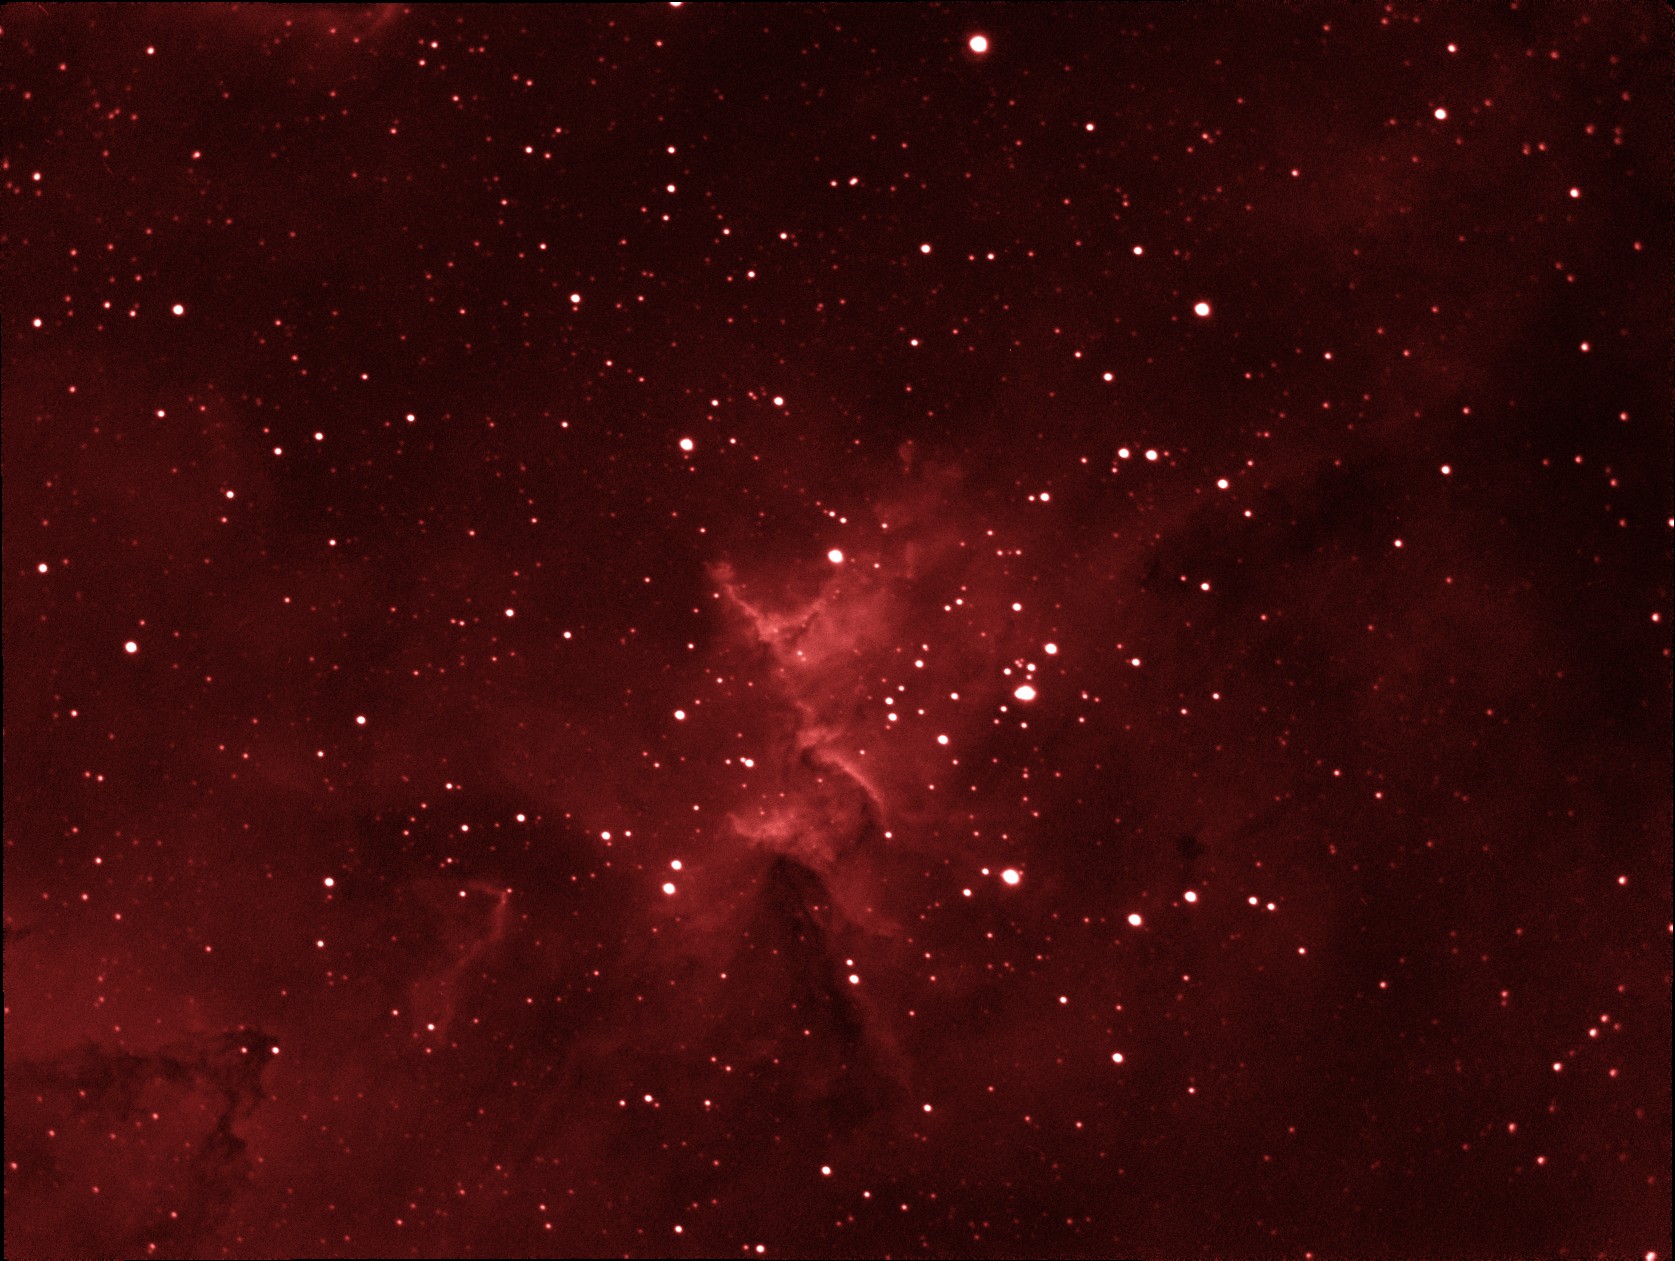
My balcony observatory provided with great views as well. As Cassiopeia slowly dips north it becomes visible from my balcony and I was able to use my Celeston C8 and Hydrogen alpha narrow bad filter to capture the central emission nebula and the Melotte 15 open cluster there-in.
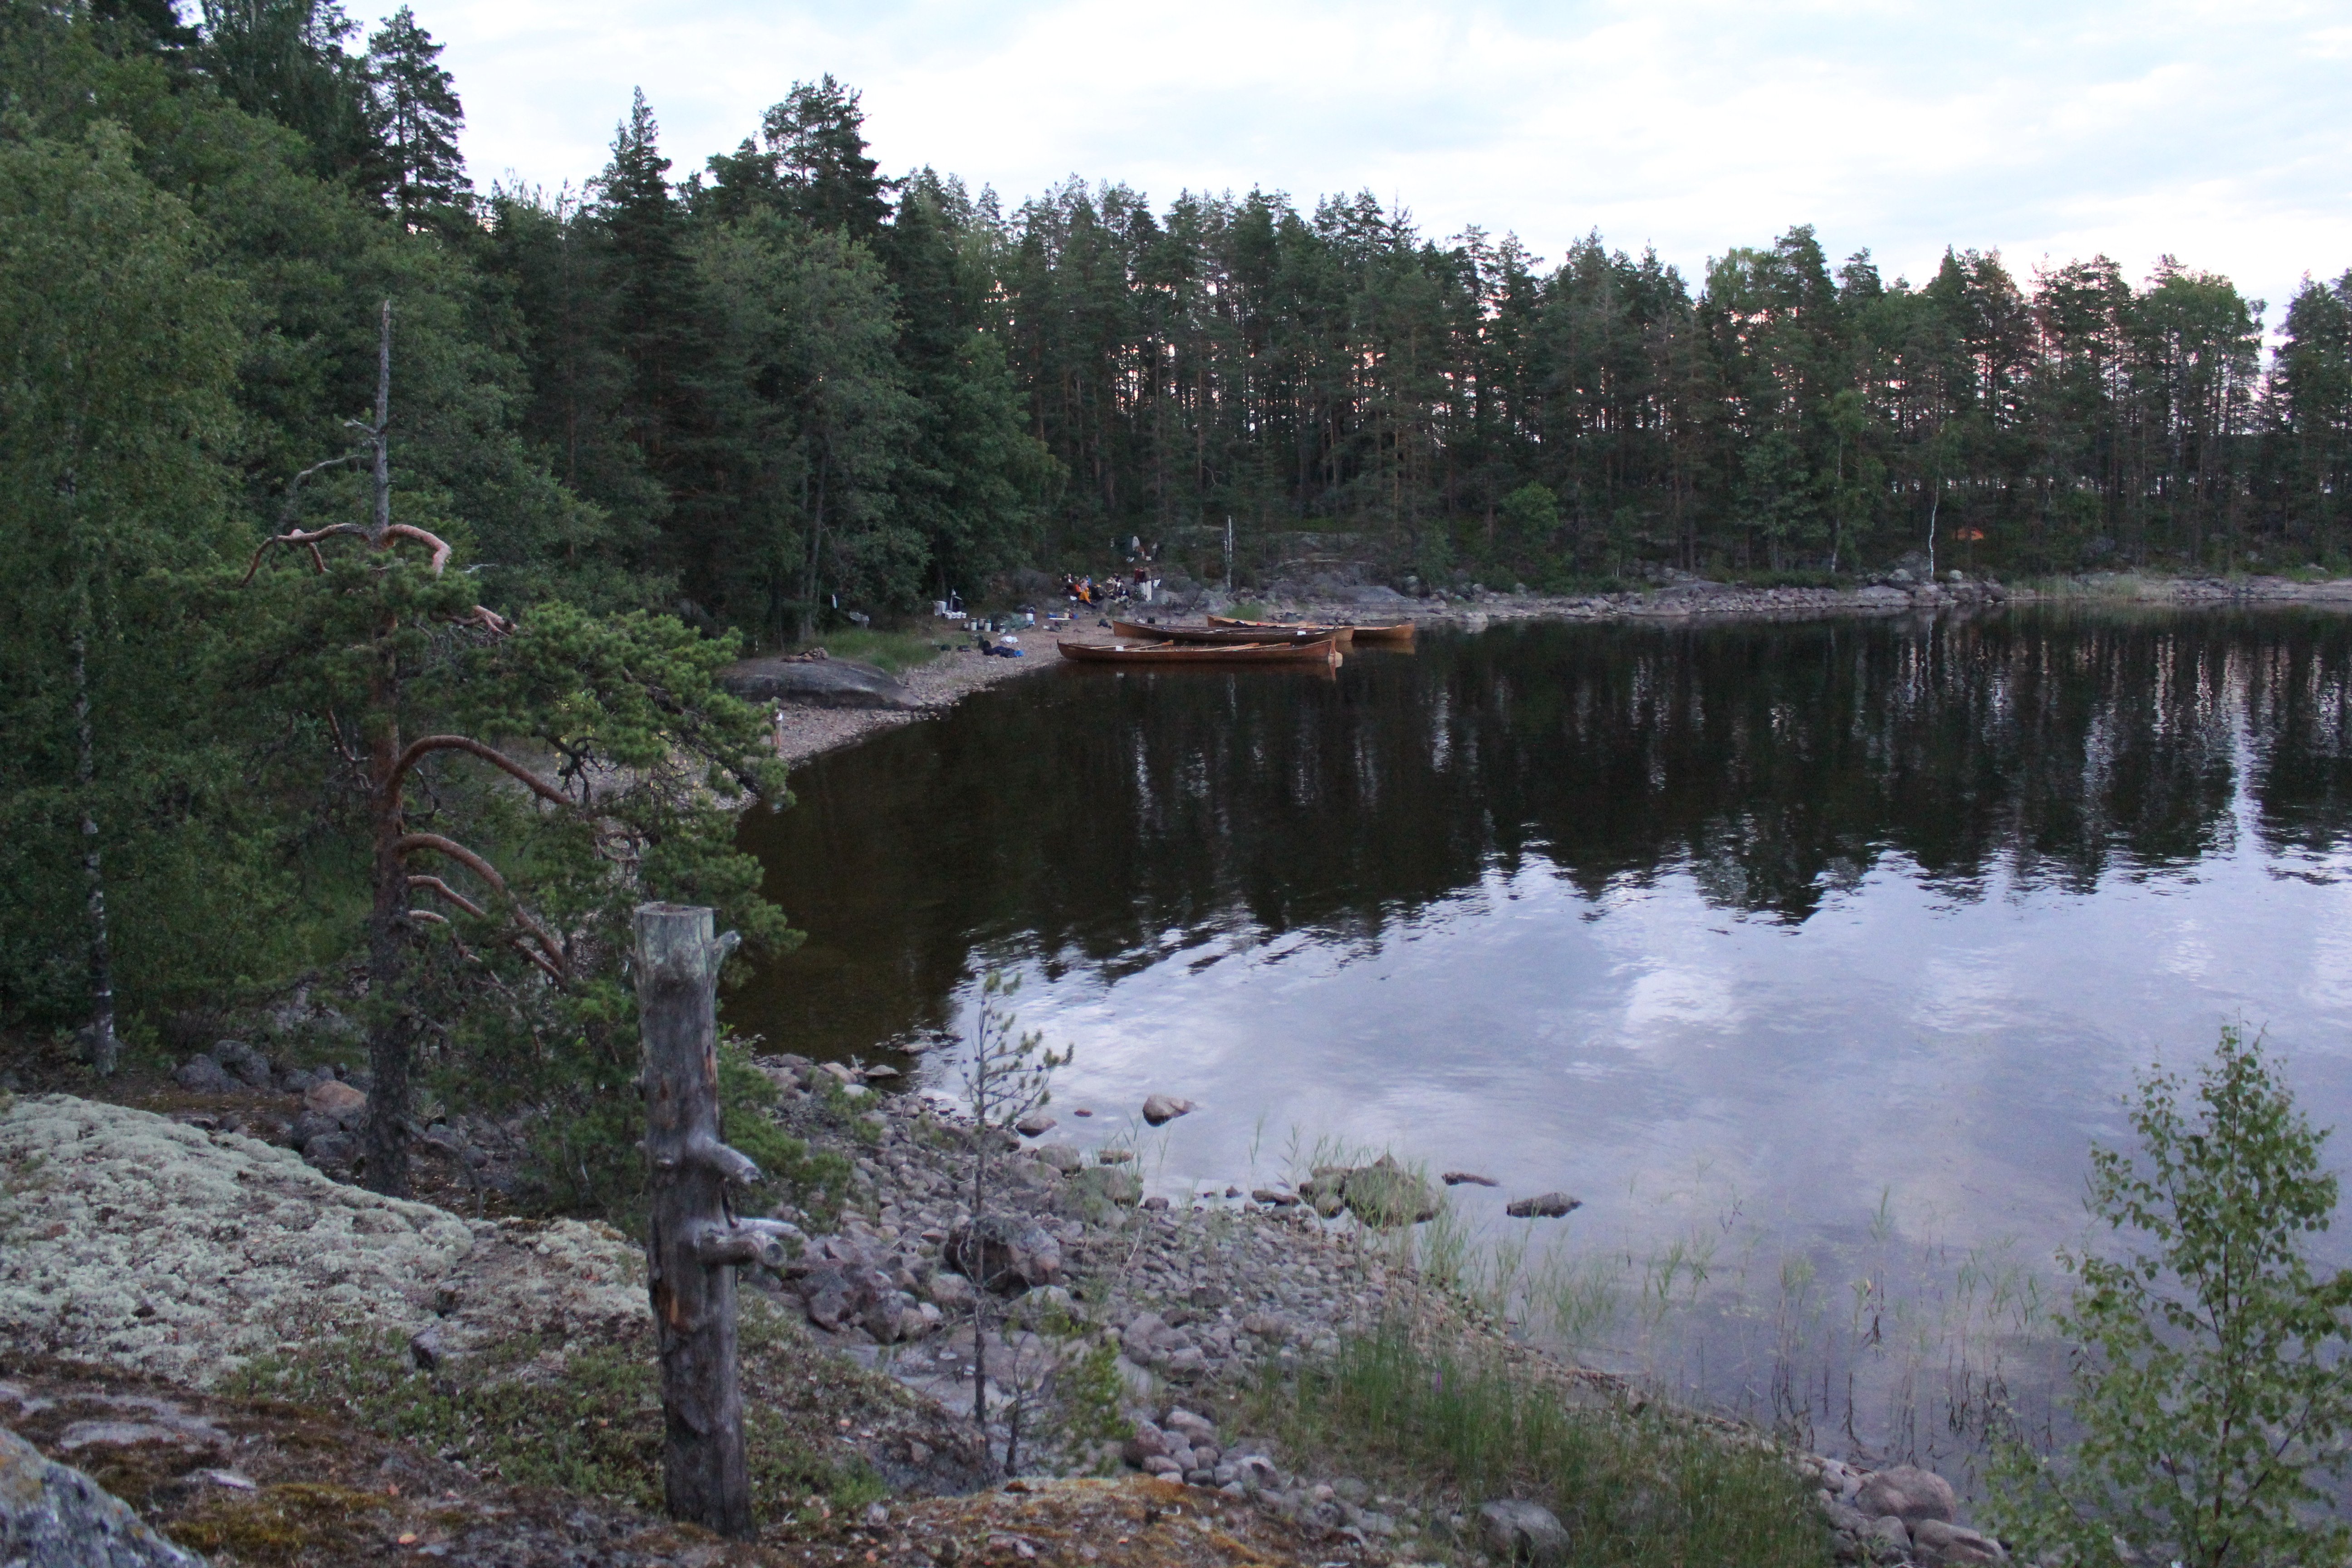
And what would a summer be without Wene-WiOL?
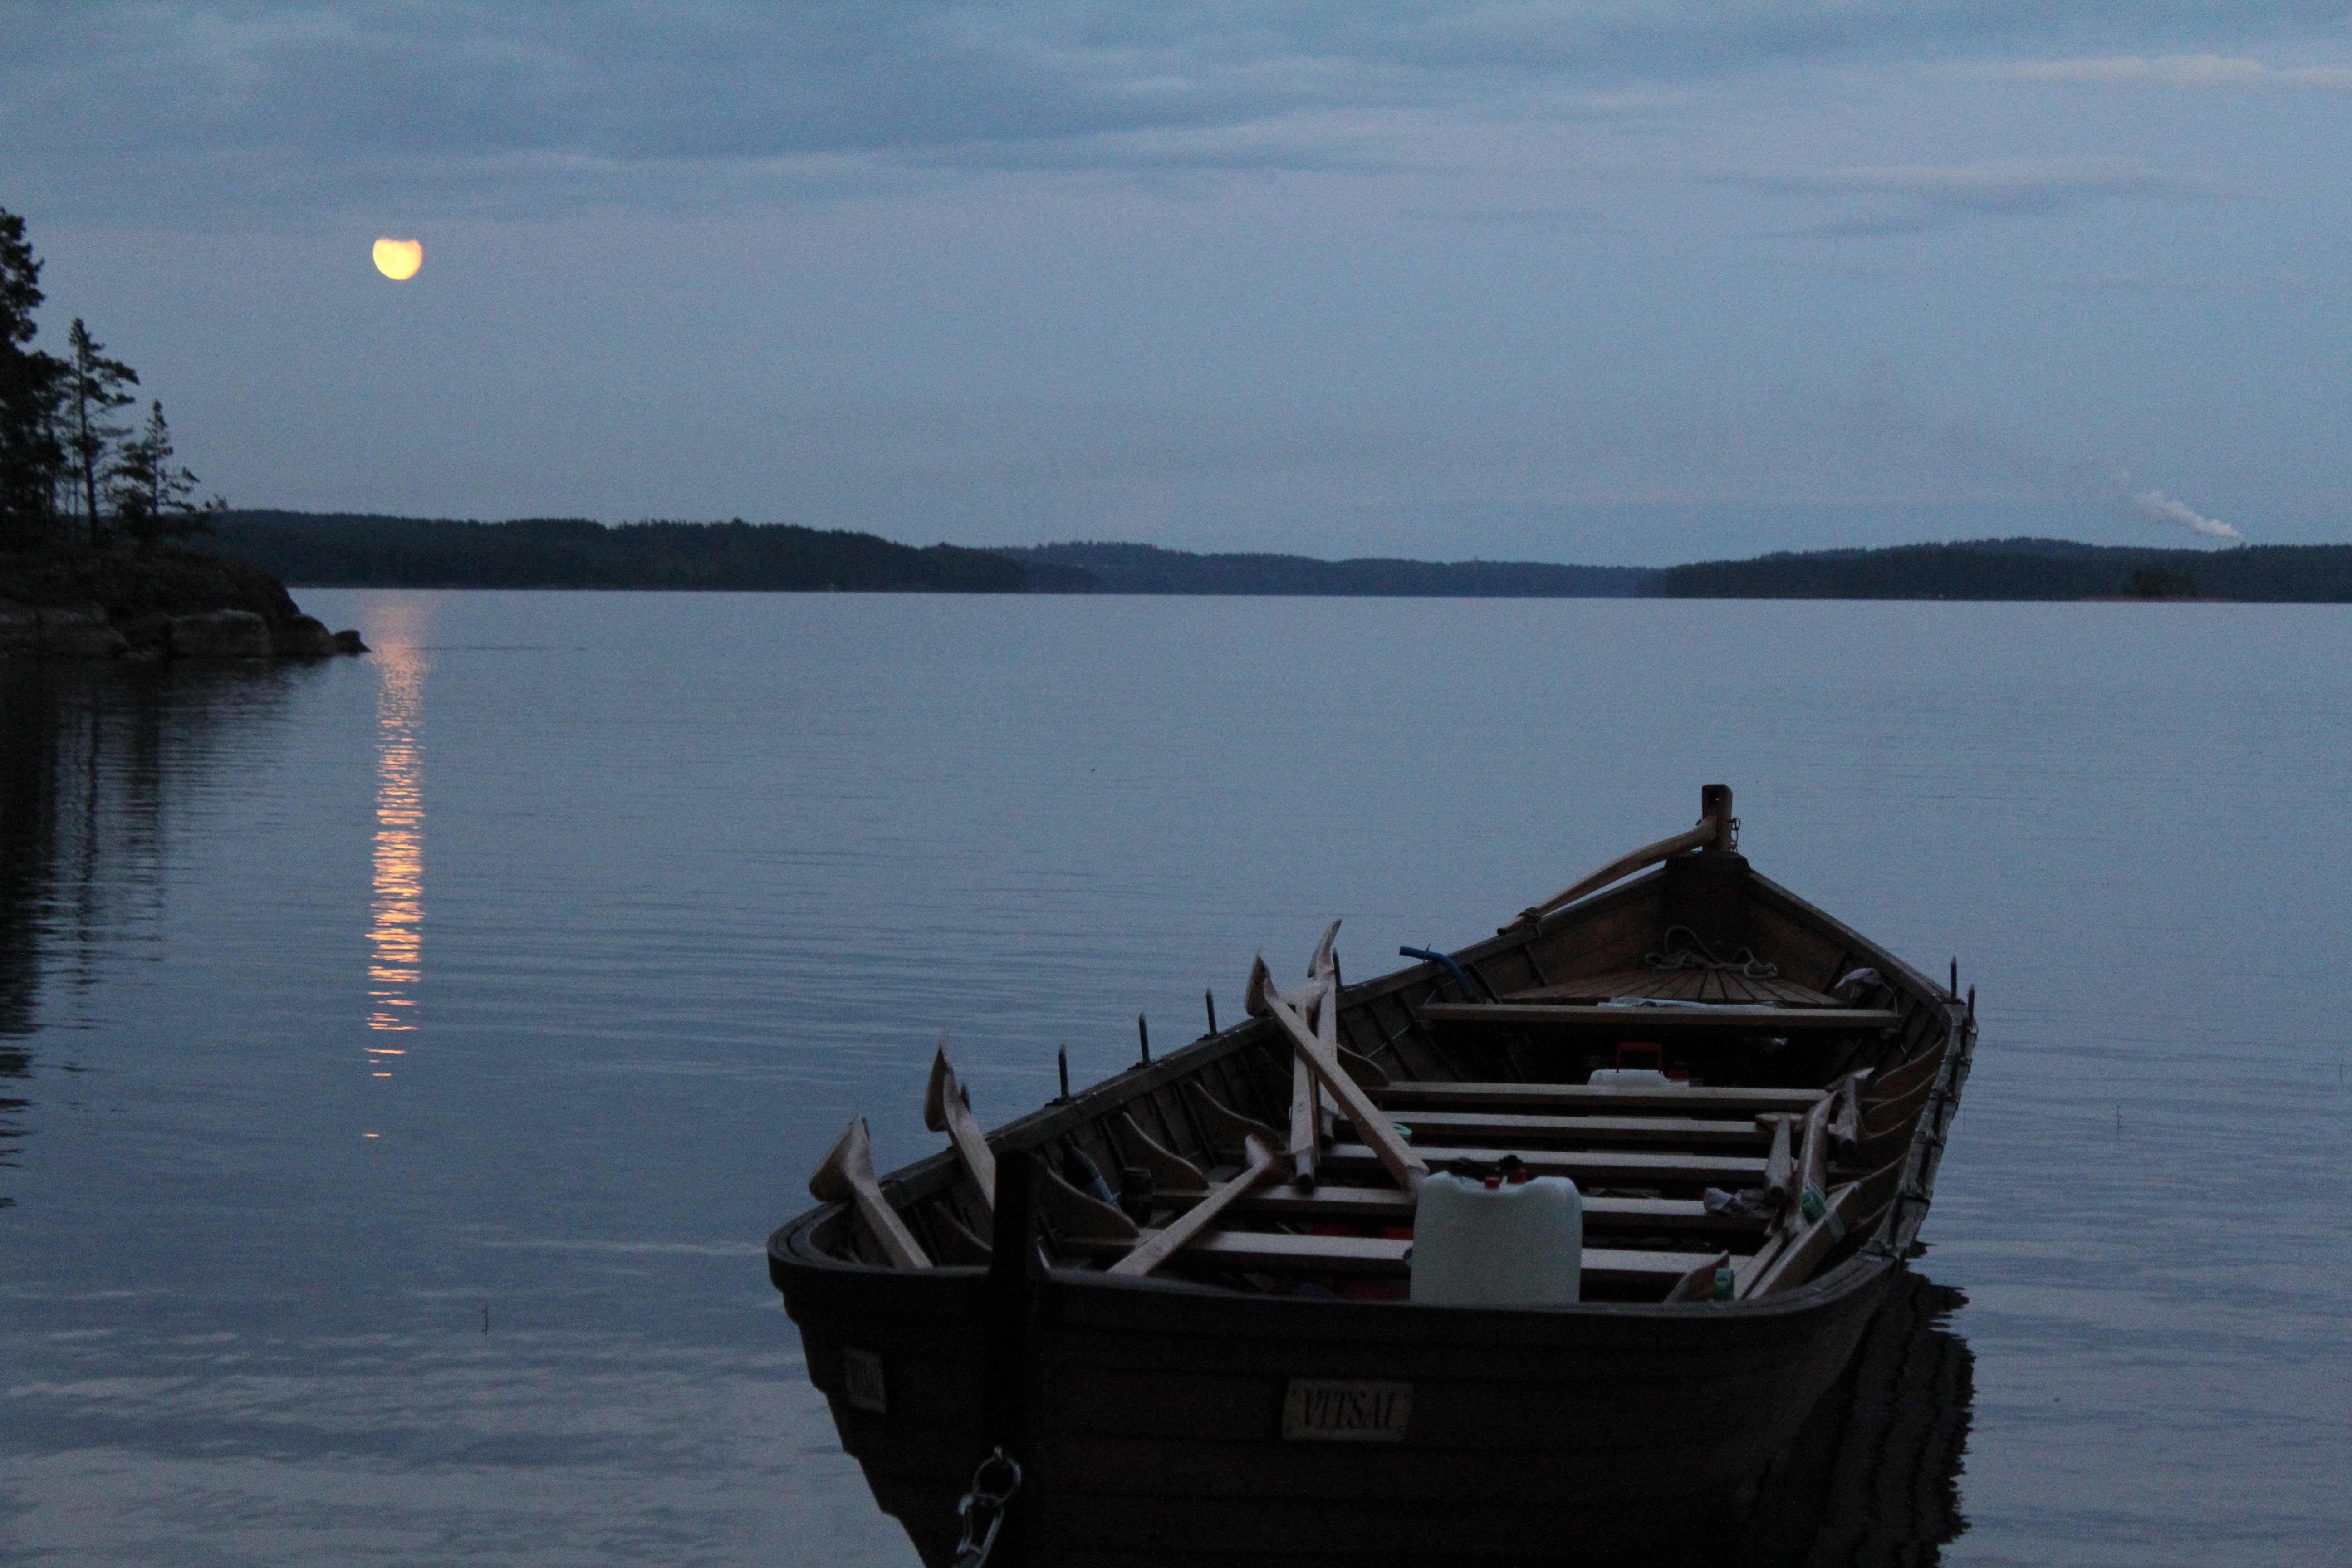
I had taken the task of captain, charting our rowing route with plenty of options for camping, lunch breaks, swimming breaks and other breaks as well as alternate routes for various wind directions. After crossing to lake Kuolimo we had five huge rowing boats in the water at the same time, a veritable armada with an advanced sonic weapon called "a slightly tipsy mixed choir".
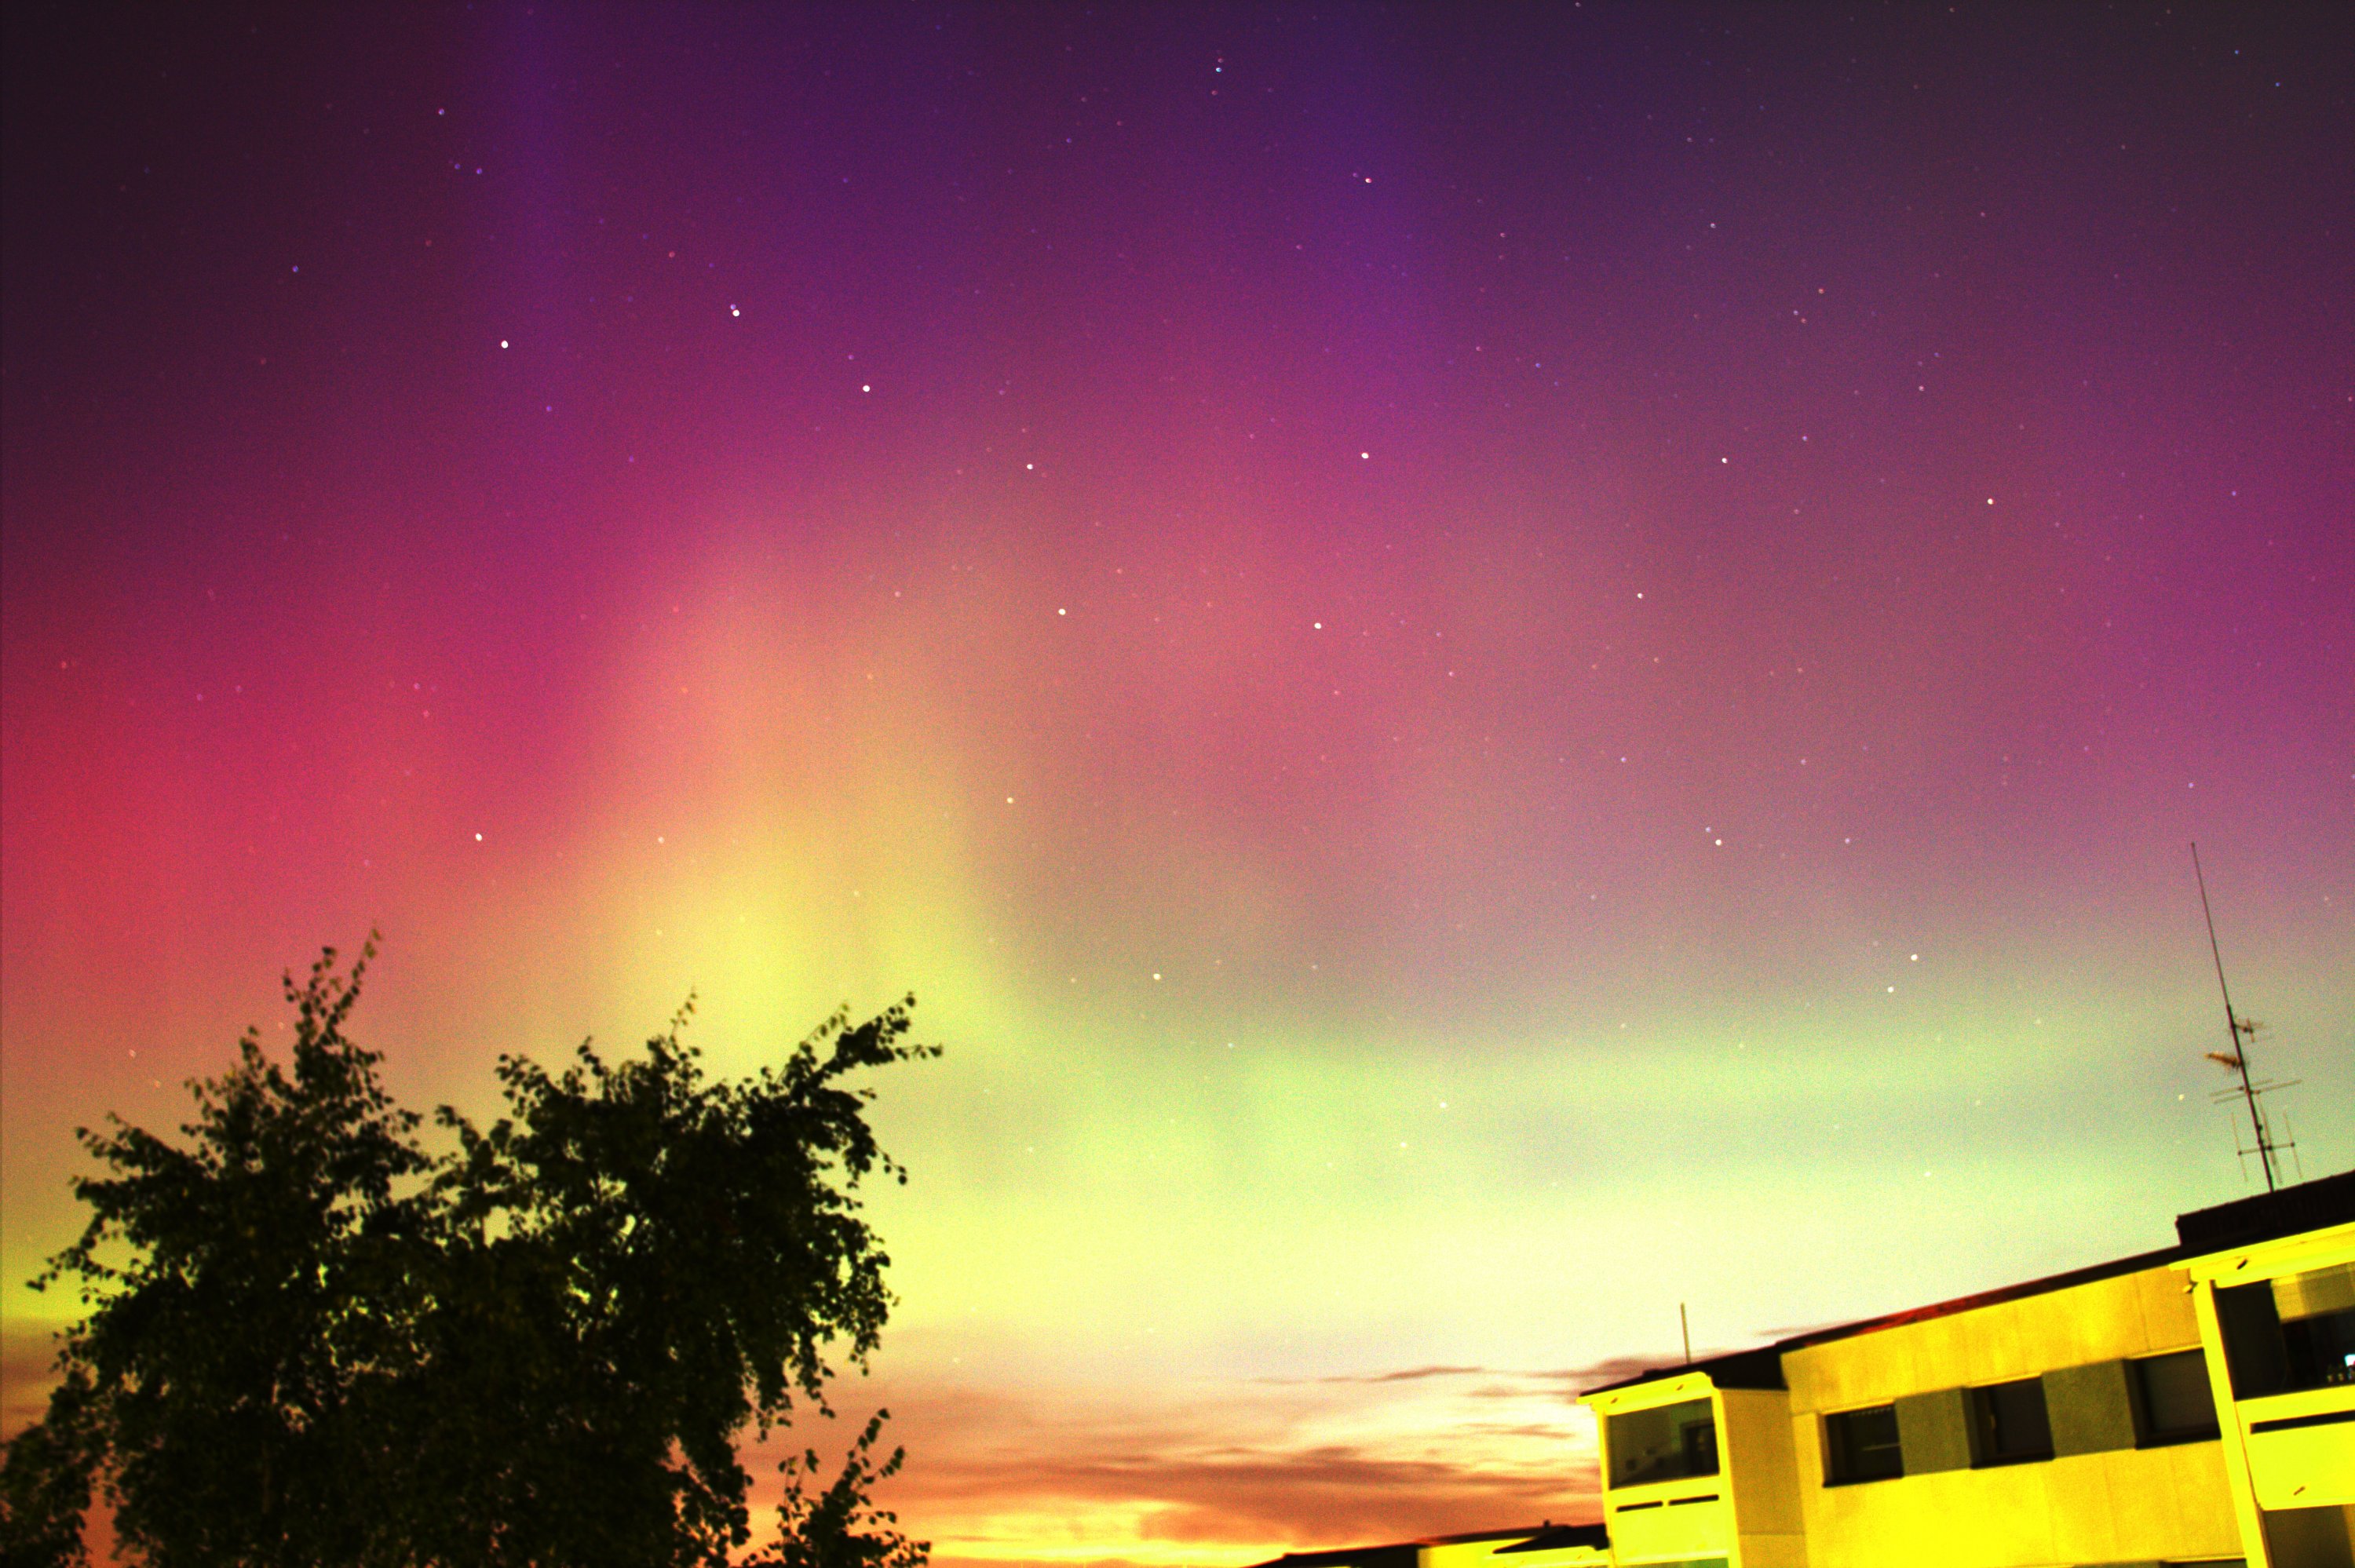
In the fall the nights grew dark again and the Sun gave a few nice lightshows with northen lights. I was trying to take a nice time-lapse for a star-trail pic, but it was ruined with an exceptionally bright display while I was happily asleep. Later in the fall I happened to wander outside while photographing in order to do some visual observations of Jupiter. The sky look ominously bright and fearful of unexpected cloud-covers I wasn't the least worried about ruined exposures after watching a mesmerizing display of green and red filling the sky beyond zenith. Definitely the best Aurora Borealis in southern Finland within nearly a decade.
Being fed-up with all the snow last winter I built a minimalistic rolling-roof observatory box at Komakallio. It's just barely big enough to fit the WO FLT-110 as well as my C8.
My project for controlling the dew heater and flat-box took a step forward when my PCBs arrived. "All" I have left now is putting it into a case, write the firmware and PC-end control-SW plus add a few sensors for sky-temp, air-temp, relative humidity and ambient illumination.
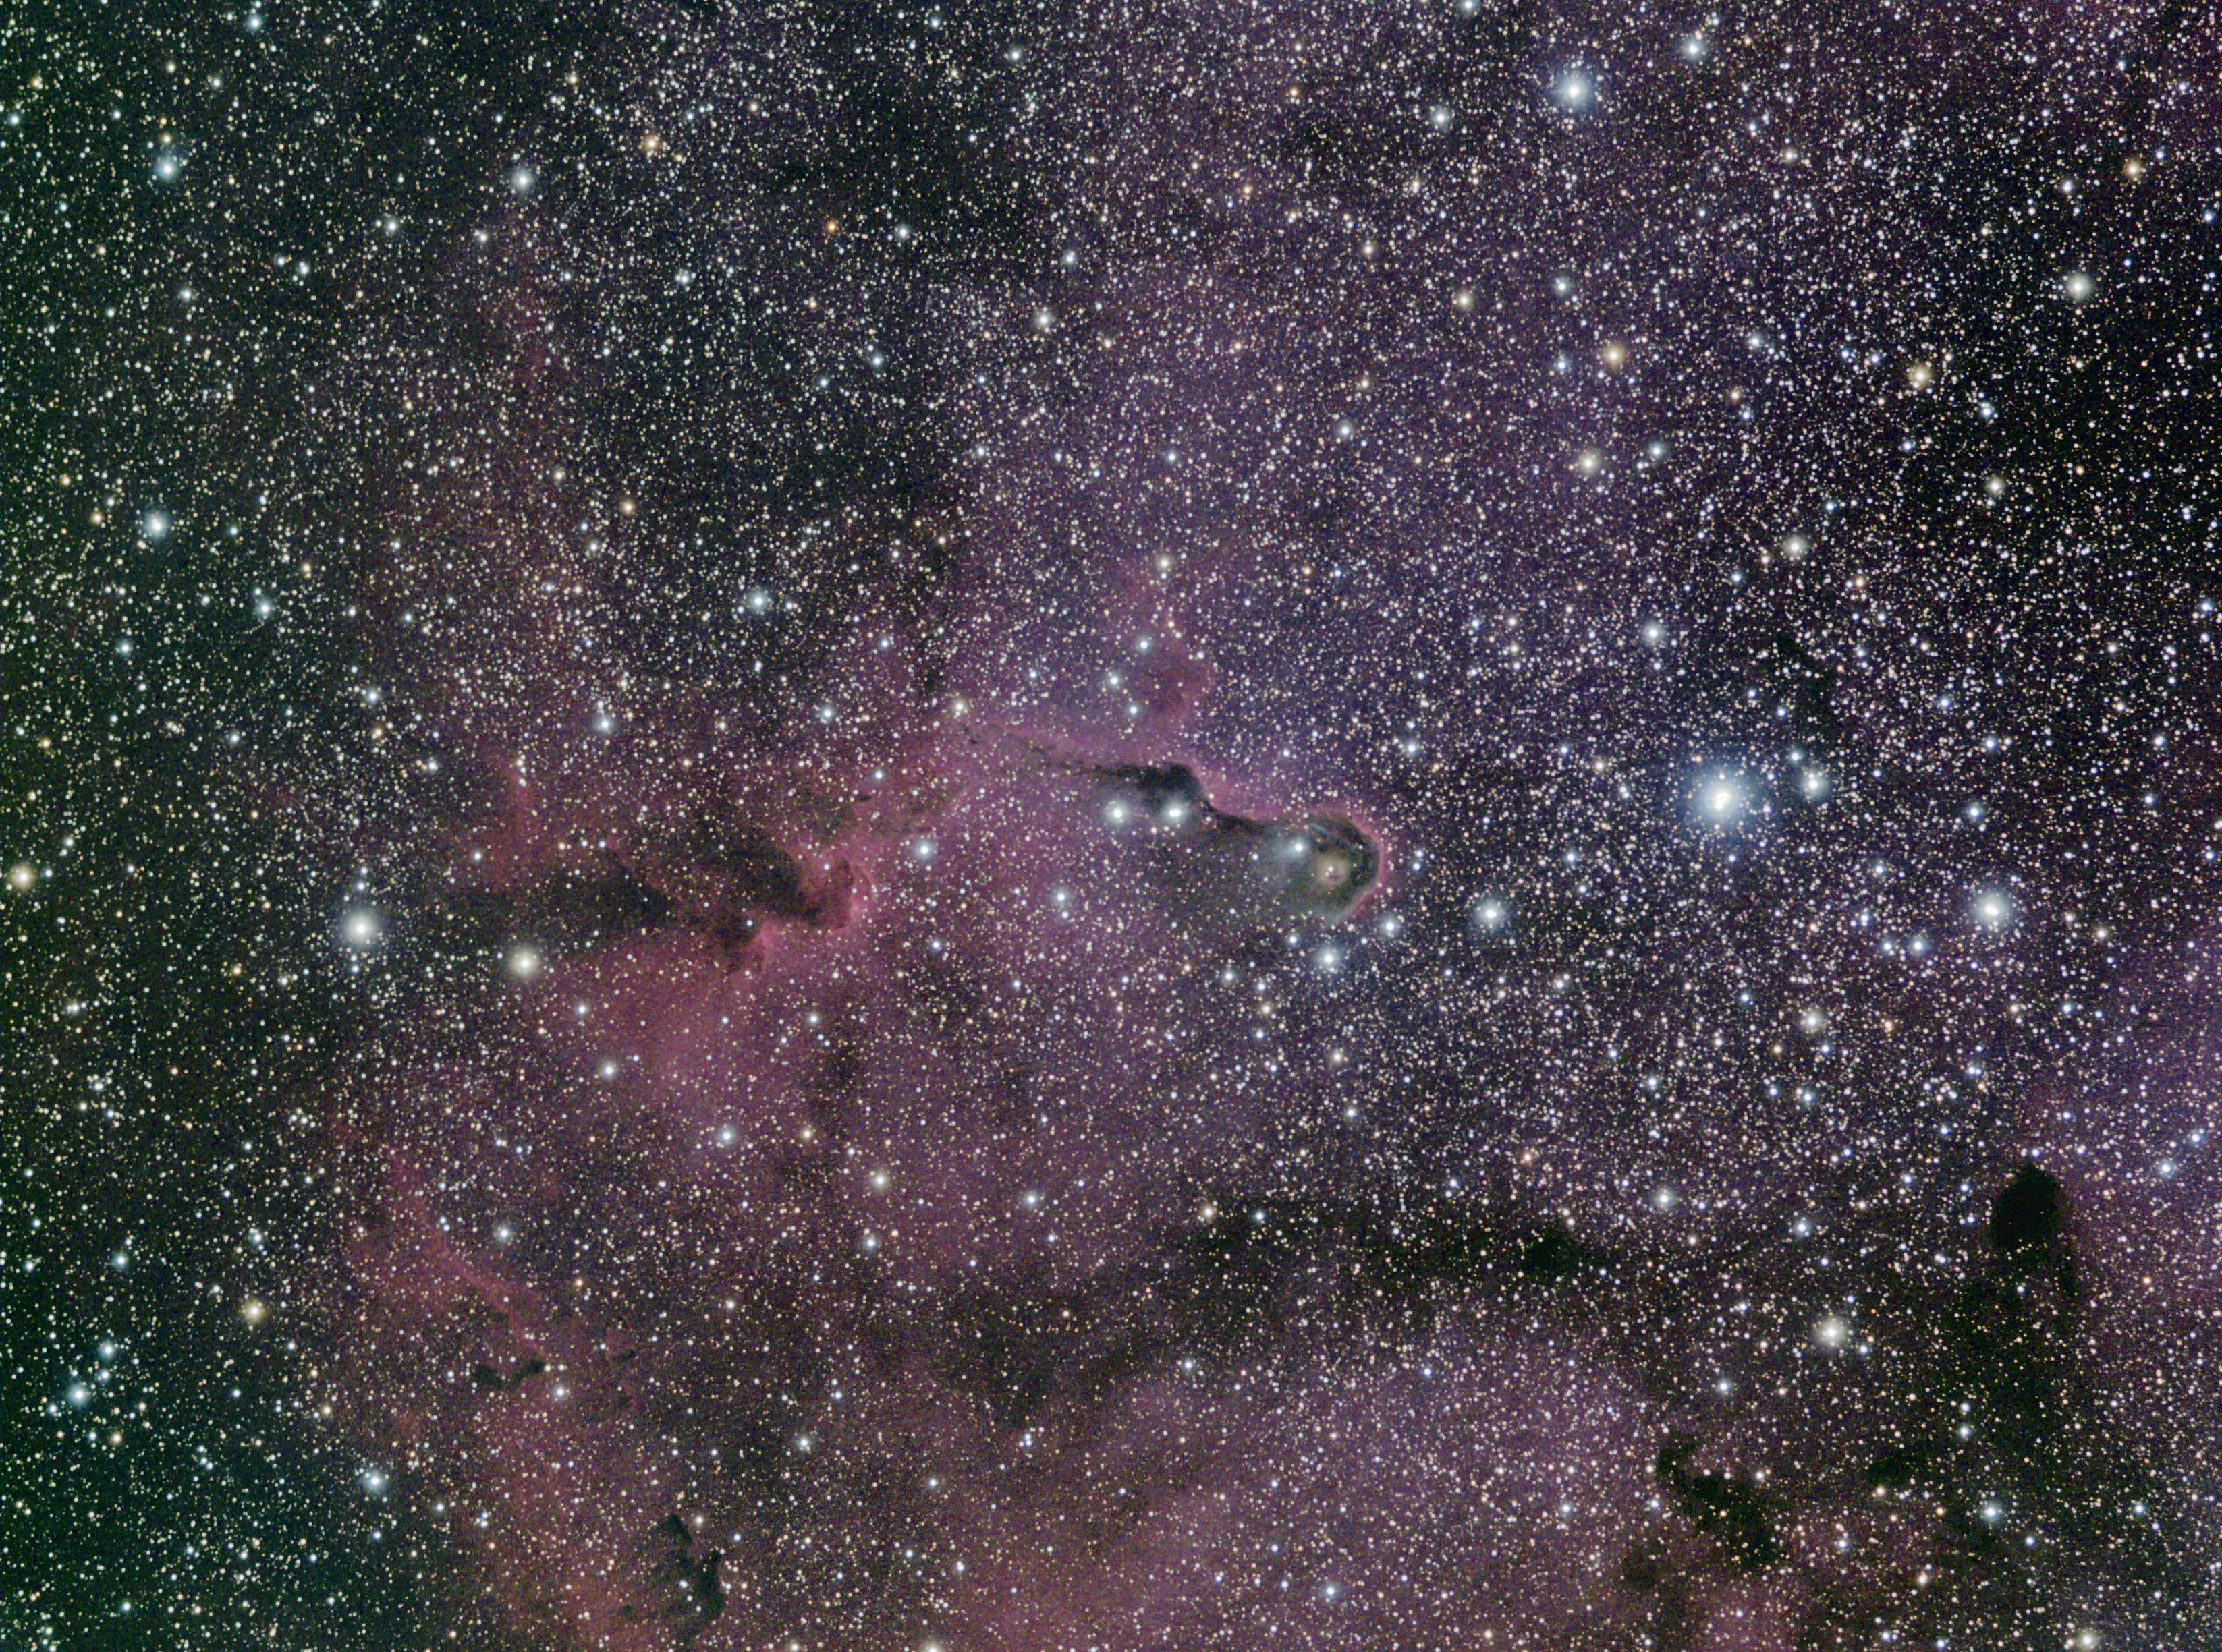
The annoying star-shapes issue was solved. The WO FR/FF-III reducer/flattener doesn't work correctly with larger sensor sizes on the FLT-110 telescope. I bought myself a WO AFR-4 reducer and now the stars are round within 5% in the corners. The Elephant's Trunk nebula shows beautiful details despite the short total exposure.
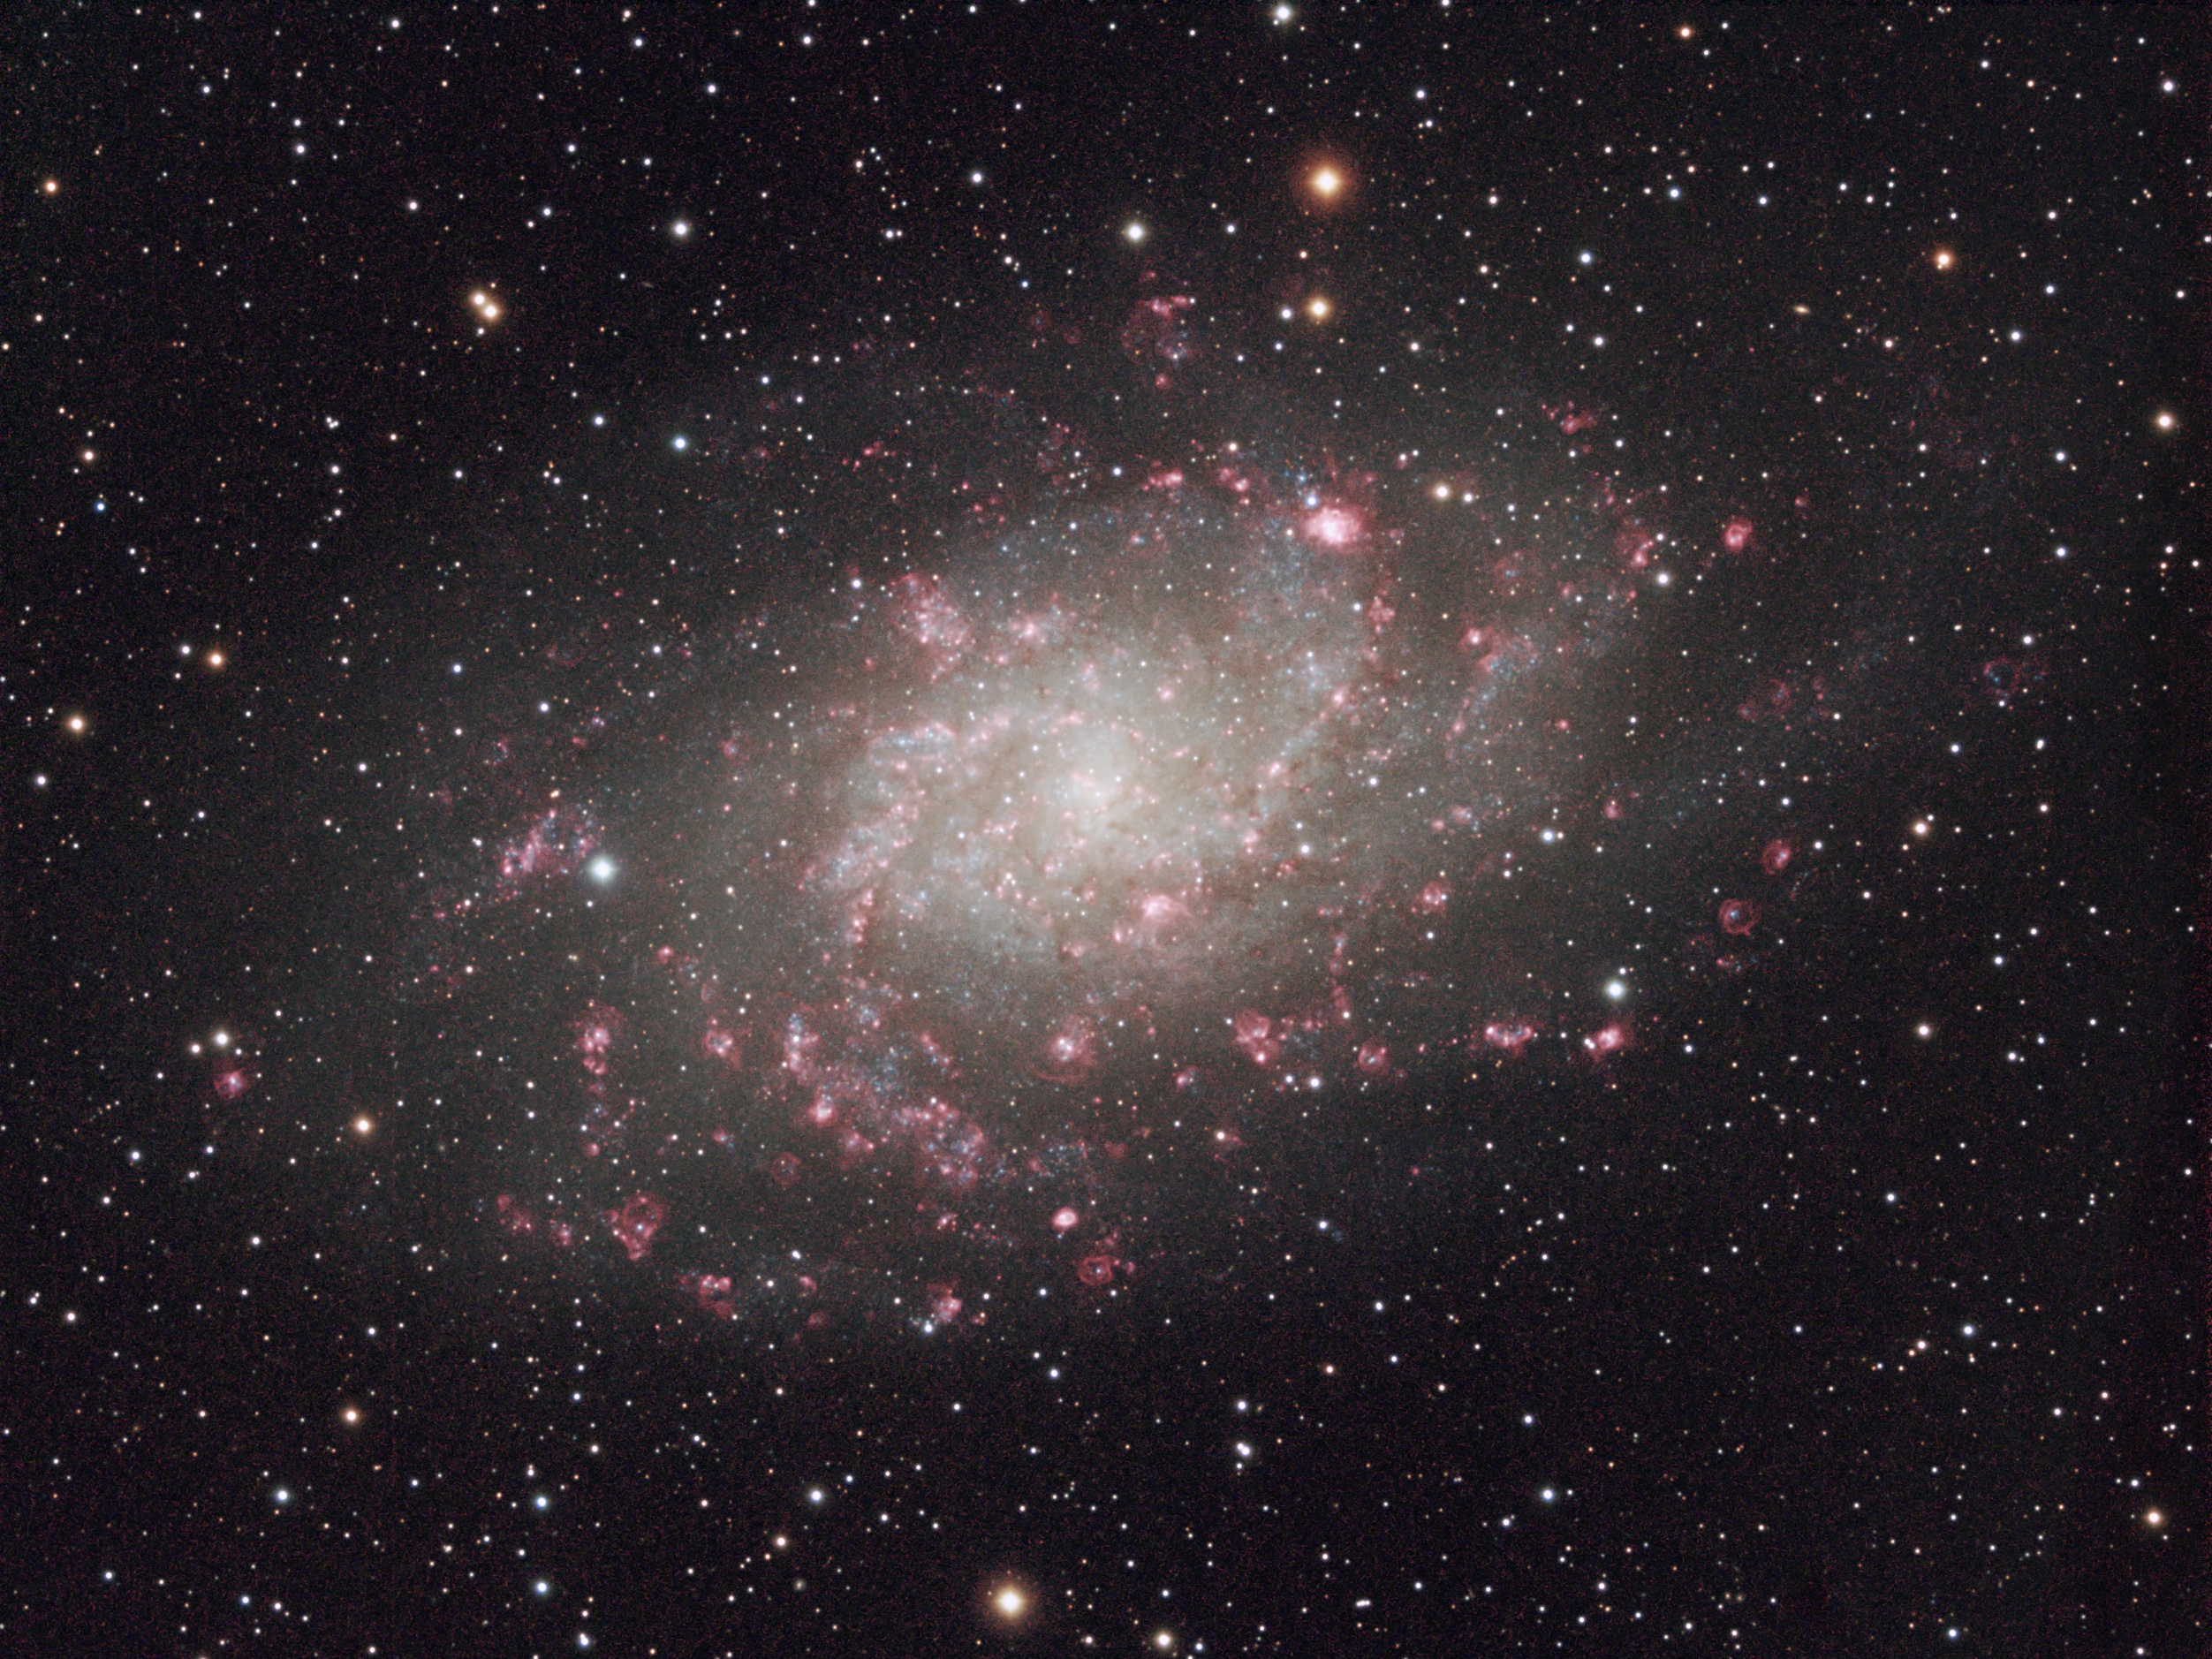
My main project was the Messier 33 Triangulum galaxy. This has the second longest total exposure, 14 hours, of my astrophoto projects. It's an LHaRGB image, where the letters stand for Luminance, Hydrogen alpha, Red, Green, Blue. The Luminance channel adds brightness to the whole image, RGB channels add brightness and color and the Ha channel is used here to accentuate the bright red hydrogen regions. It took several attempts to get the colors right, although I'm not yet completely satisfied with this.
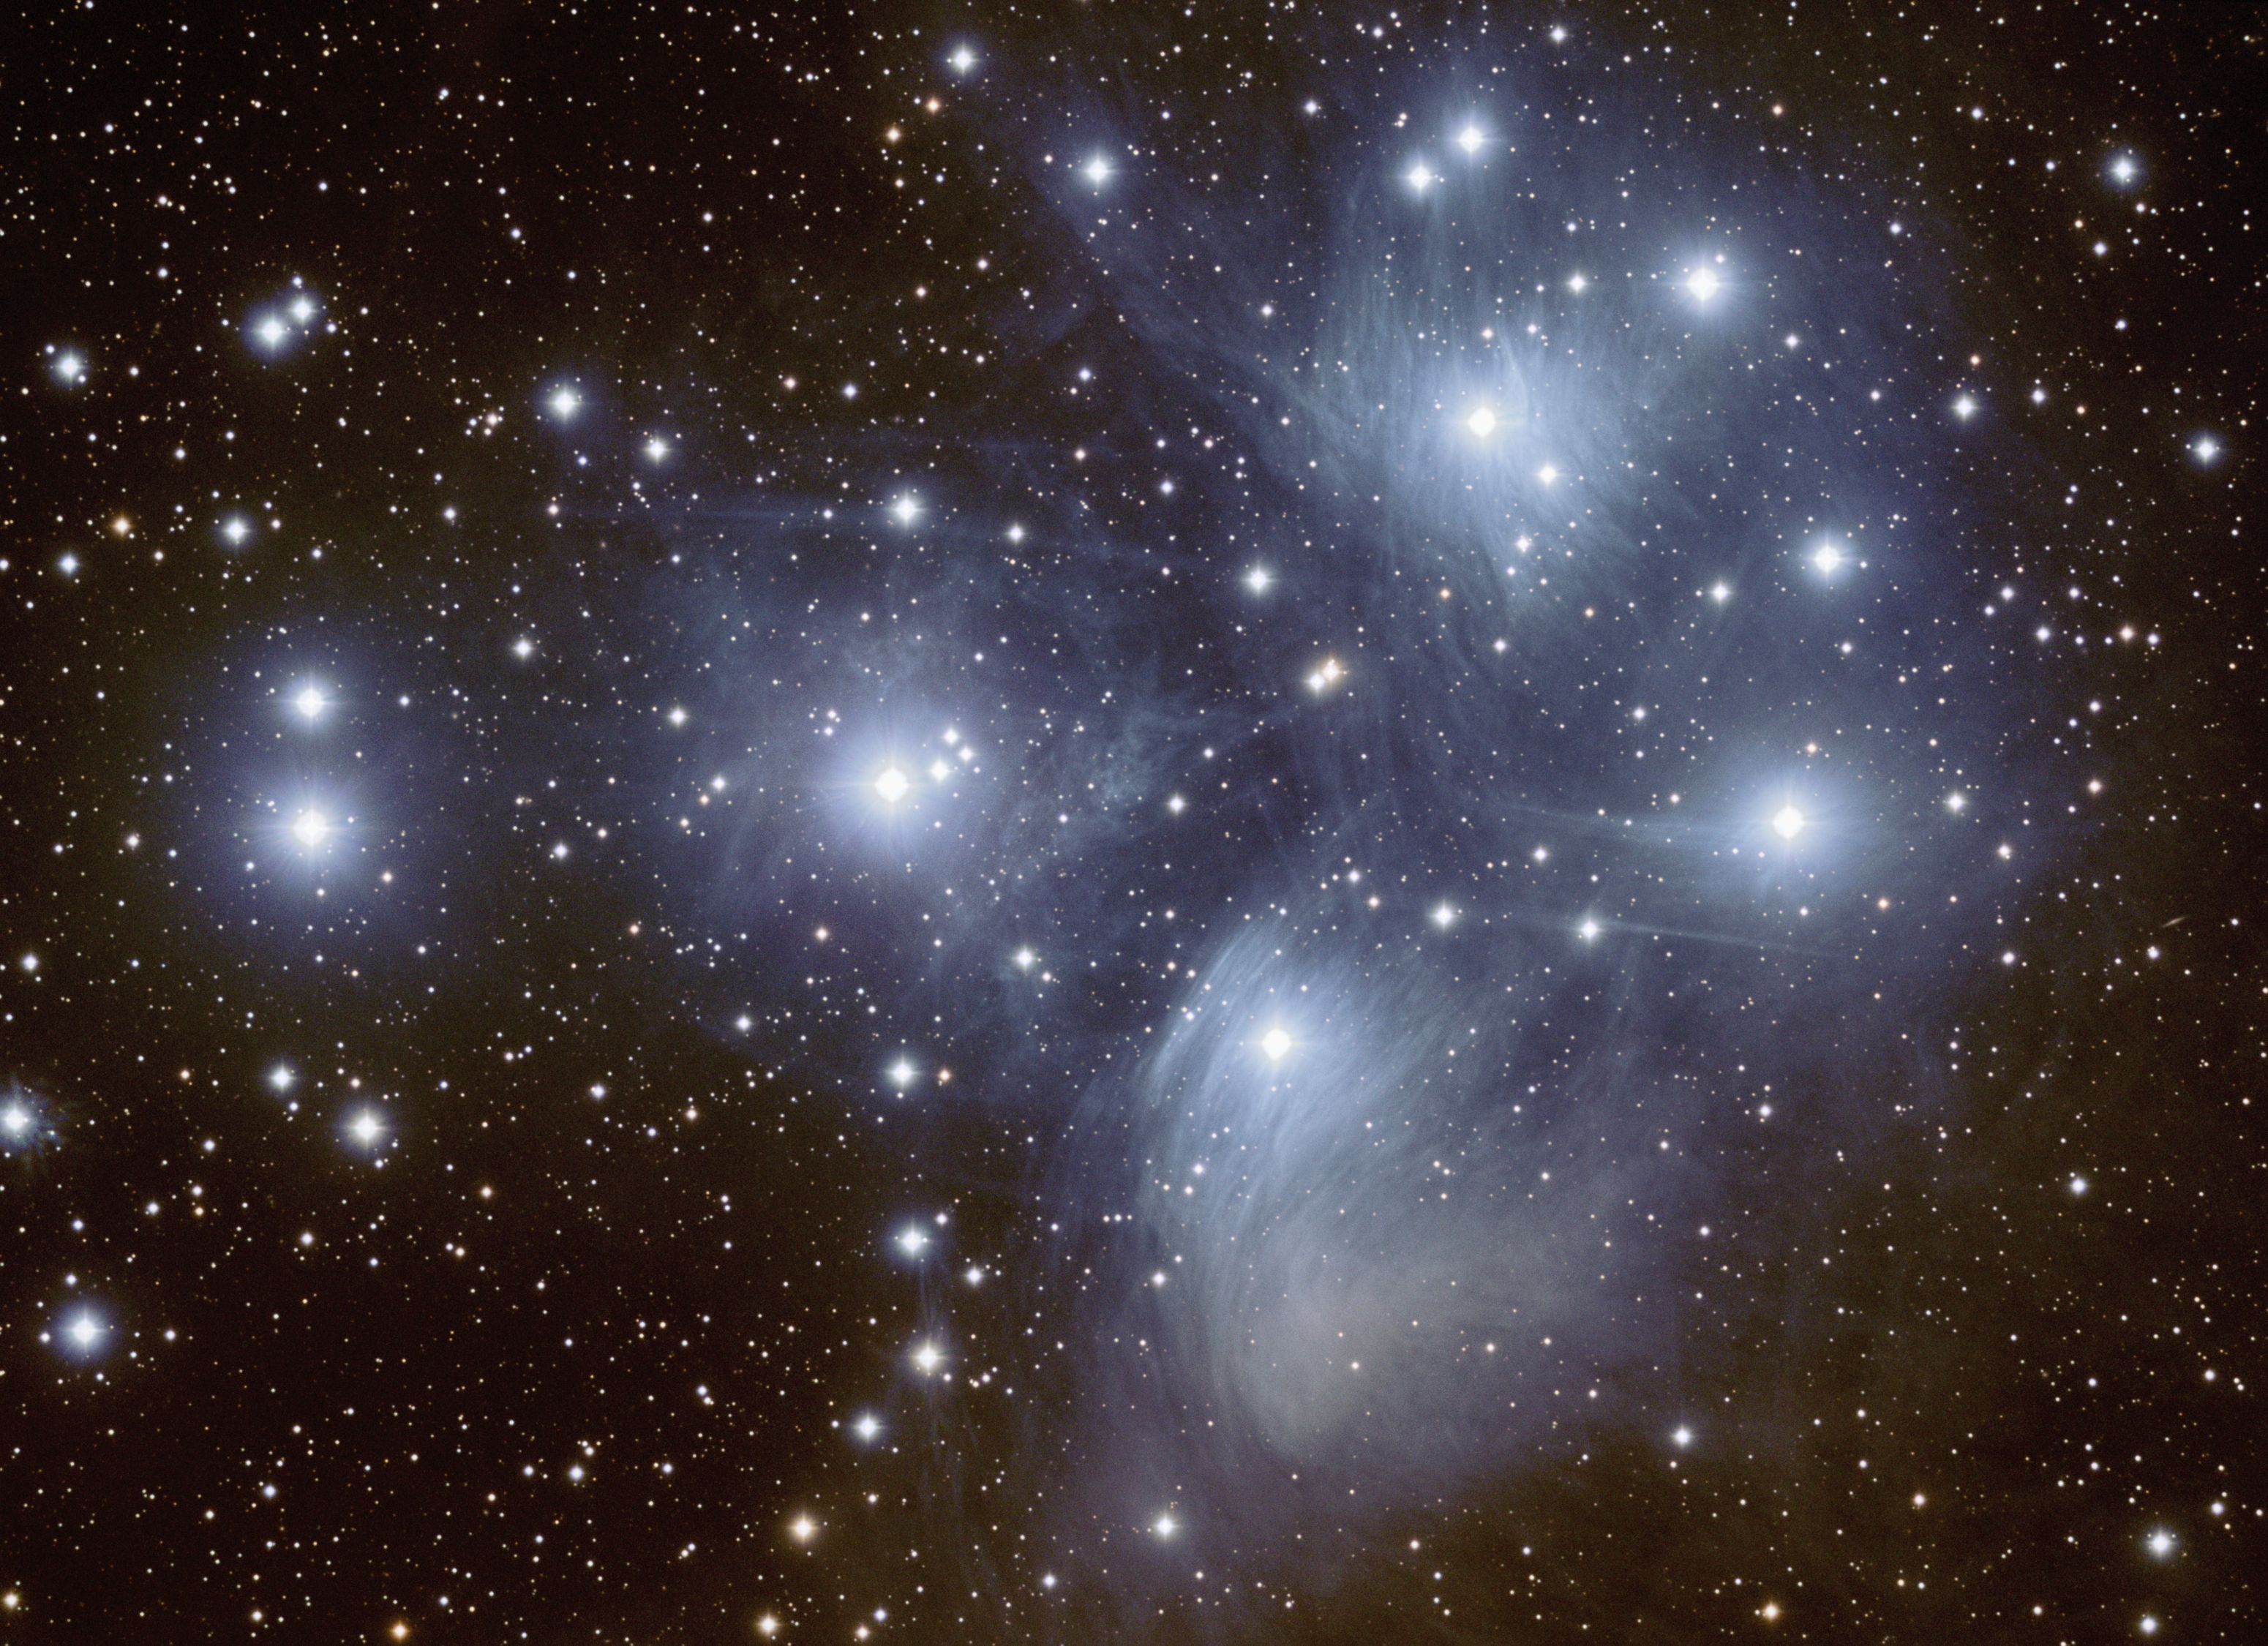
My secondary fall-project was the Pleiades, I took an hour and a half from the morning sky in September and later a bit more light for this slightly off-tinted rendition. A bit more training is needed for color grading the shots.
The December was effectively lost to clouds, better luck next year.
Despite the snowy conditions and random technical problems, I managed to take a successful exposure of the Rosette nebula.
The mechanical shutter and difficult dew conditions sparked the idea for building a microcontroller based dew heater and flat-frame illuminator controller box. After a few nights of tweaking I had my first protoboard build up and running, the flat-panel light level was adjustable after all.
At the end of February my "big" project reached its conclusion and my first reasonably good HST palette image ever taken saw the light of day. Rosette nebula in narrowband false color with total integration time of 21 hours was the new par to exceed in coming weeks and months. The project was shot with 2x2 binning since I couldn't get pin-point round stars across the field for some reason with the astro-club's William Optics FLT-110 and the WO FR/FF-III reducer/flattener.
My balcony observatory provided with great views as well. As Cassiopeia slowly dips north it becomes visible from my balcony and I was able to use my Celeston C8 and Hydrogen alpha narrow bad filter to capture the central emission nebula and the Melotte 15 open cluster there-in.
And what would a summer be without Wene-WiOL?
I had taken the task of captain, charting our rowing route with plenty of options for camping, lunch breaks, swimming breaks and other breaks as well as alternate routes for various wind directions. After crossing to lake Kuolimo we had five huge rowing boats in the water at the same time, a veritable armada with an advanced sonic weapon called "a slightly tipsy mixed choir".
In the fall the nights grew dark again and the Sun gave a few nice lightshows with northen lights. I was trying to take a nice time-lapse for a star-trail pic, but it was ruined with an exceptionally bright display while I was happily asleep. Later in the fall I happened to wander outside while photographing in order to do some visual observations of Jupiter. The sky look ominously bright and fearful of unexpected cloud-covers I wasn't the least worried about ruined exposures after watching a mesmerizing display of green and red filling the sky beyond zenith. Definitely the best Aurora Borealis in southern Finland within nearly a decade.
Being fed-up with all the snow last winter I built a minimalistic rolling-roof observatory box at Komakallio. It's just barely big enough to fit the WO FLT-110 as well as my C8.
My project for controlling the dew heater and flat-box took a step forward when my PCBs arrived. "All" I have left now is putting it into a case, write the firmware and PC-end control-SW plus add a few sensors for sky-temp, air-temp, relative humidity and ambient illumination.
The annoying star-shapes issue was solved. The WO FR/FF-III reducer/flattener doesn't work correctly with larger sensor sizes on the FLT-110 telescope. I bought myself a WO AFR-4 reducer and now the stars are round within 5% in the corners. The Elephant's Trunk nebula shows beautiful details despite the short total exposure.
My main project was the Messier 33 Triangulum galaxy. This has the second longest total exposure, 14 hours, of my astrophoto projects. It's an LHaRGB image, where the letters stand for Luminance, Hydrogen alpha, Red, Green, Blue. The Luminance channel adds brightness to the whole image, RGB channels add brightness and color and the Ha channel is used here to accentuate the bright red hydrogen regions. It took several attempts to get the colors right, although I'm not yet completely satisfied with this.
My secondary fall-project was the Pleiades, I took an hour and a half from the morning sky in September and later a bit more light for this slightly off-tinted rendition. A bit more training is needed for color grading the shots.
The December was effectively lost to clouds, better luck next year.
Subscribe to:
Posts (Atom)